Ten-hour shifts are a practical choice when you want longer coverage blocks and a rotation that teams can learn quickly. This 10 hour shift schedule template is designed for planning that rotation in a repeatable format, so supervisors can assign coverage, staff can check their upcoming shifts, and updates can be made without rebuilding the schedule.
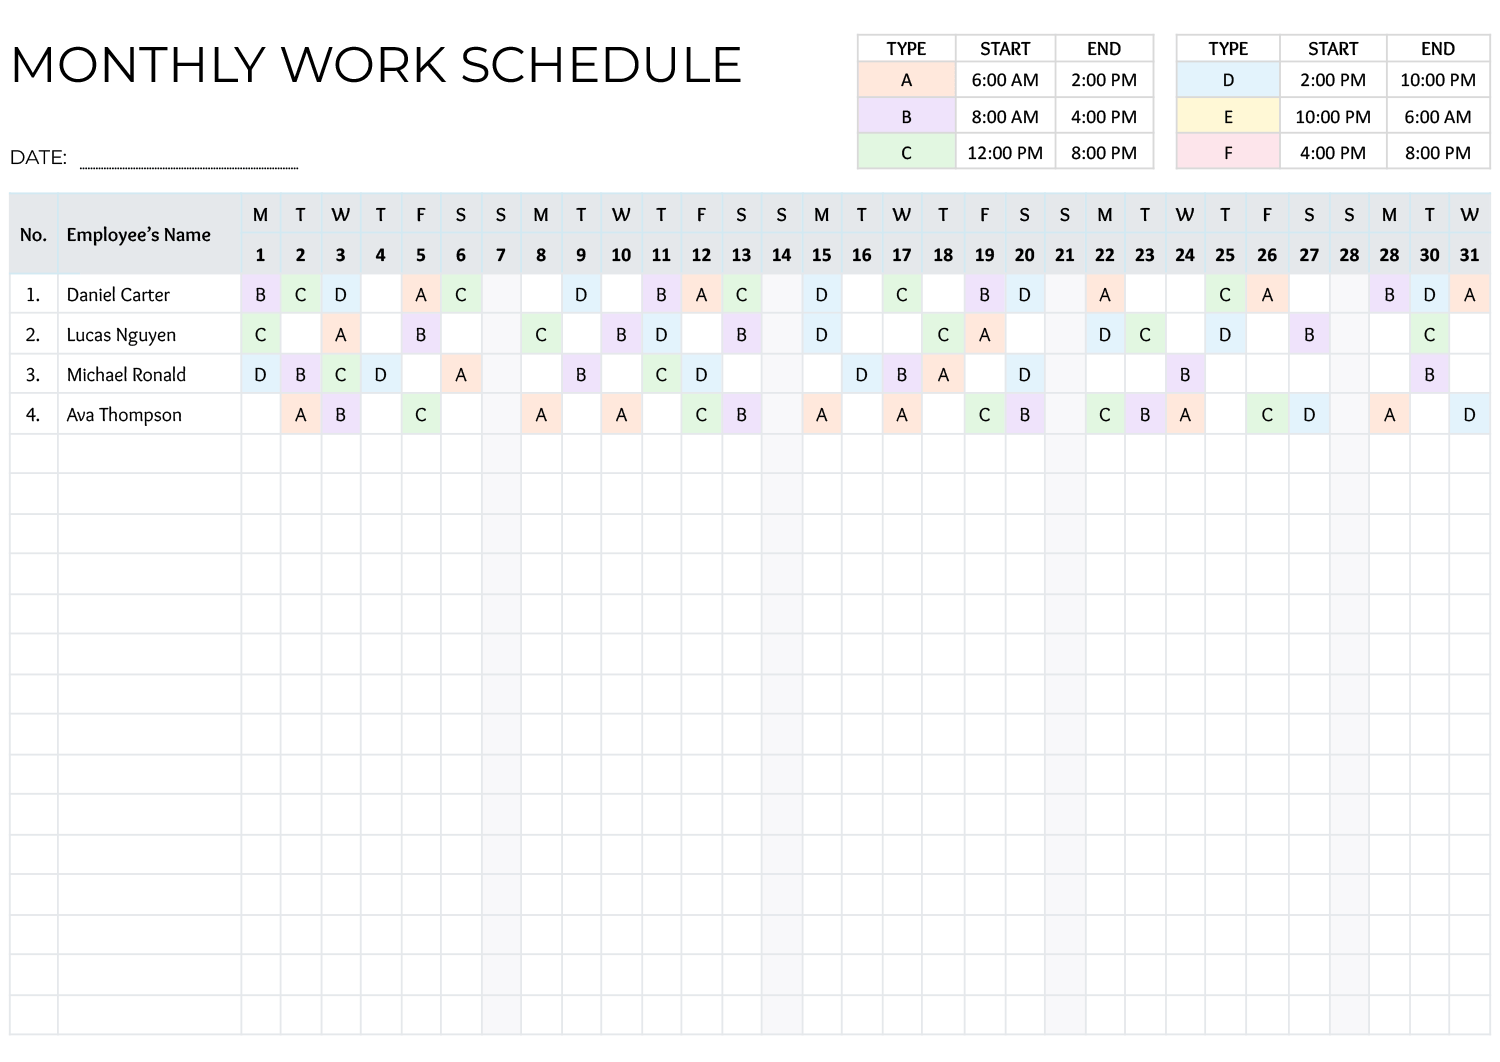
The template is designed with a grid that lists teams on the left and assigns shifts across the cycle using clearly labeled entries. In the schedule area, you select 1st, 2nd, or 3rd from a drop-down list, and the cell fills with the matching shift color through conditional formatting. This turns the schedule into a quick visual check for work blocks, days off, and shift distribution.
A ready-made rotation pattern is already entered in the sheet, so you can start from an existing schedule and adjust it to match your staffing needs. You can keep the pattern and change start points for each team, or clear and rebuild a row using your own work and rest rhythm while keeping the same shift labels and color logic.
How to Fill Out the 10 Hour Rotation
Start by deciding what Day 1 means for your workplace. Many teams anchor Day 1 to the first day of a pay period. Others anchor it to the first day a new rotation goes live. Once you choose that anchor, the cycle becomes easier to communicate, especially when someone asks what shift they are on two weeks from now.
Step 1. Confirm Day 1 and the Pre-Filled Rotation
The schedule is already populated with a rotating pattern across the 21 days. Before you edit anything, scan each team row and confirm the rhythm matches what you want. If your operation uses four workdays followed by three days off, you can keep the rhythm and focus on adjusting start points, team names, or shift times. If your operation uses a different work and rest rhythm, you can still use the grid, but you will edit the work blocks and off blocks to match your policy.
Step 2. Enter Shifts Using the Drop-Down Shift List
The shift cells in the schedule area are set up with data validation, so you can pick a shift option from a list instead of typing freehand. This is useful when multiple supervisors update the schedule, because it reduces mismatched entries that break the color pattern or create confusion during handoffs.
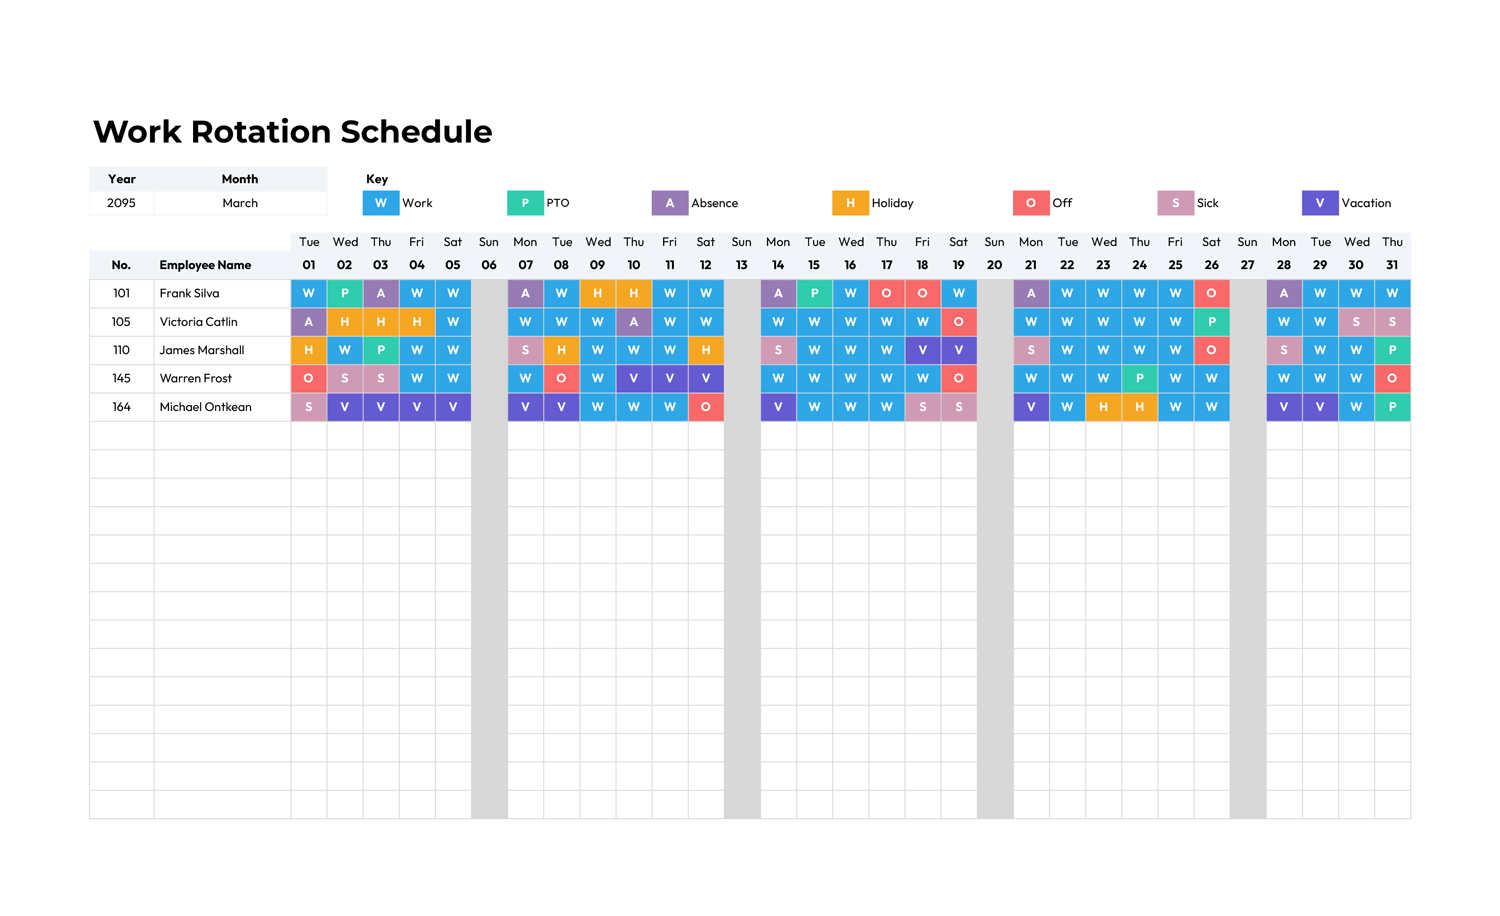
Step 3. Use Color Coding to Assign Workdays and Time Off
In the schedule grid, each shift cell uses data validation with a drop-down list, so you can select 1st, 2nd, or 3rd instead of typing. Using the drop-down keeps entries uniform across the sheet, which matters when more than one person updates the schedule.
After you select a shift, conditional formatting applies the matching fill color linked to that shift. This is what makes the rotation quick to check. You can scan across a team row to confirm work blocks and time off, and scan down a day column to confirm coverage across the three shifts. Leaving a cell blank keeps it unshaded, which is useful for rest days, PTO, and coverage gaps you still need to fill.
Step 4. Shift, Swap, or Rebuild the Pattern for Your Team
If you like the built in rotation and only need small changes, you can adjust a team by clearing a few cells for extra time off, swapping a work block to a different shift, or moving the start point earlier or later in the cycle. If you want to rebuild the pattern entirely, clear the schedule cells for a team row and re-enter the work blocks using your chosen rhythm. Many teams build one row first, then repeat the logic for other teams and stagger the start day until coverage looks right.
Step 5. Review Hours Totals After Any Schedule Changes
The Hours column totals scheduled time for each team across the cycle by counting scheduled shift entries and multiplying by 10. If you keep your shift entries as numeric codes, the total updates cleanly as you add or remove workdays. If you switch to text based labels, update the Hours calculation so totals still reflect scheduled days.
The 3rd shift shown in the legend crosses midnight. If your organization records labor by shift start date versus calendar date, add a short internal note for supervisors so time off requests and overtime checks are reviewed the same way.
Customizing the Template
If you want the schedule to line up with calendar dates, replace the day numbers with dates or add a date row above the day numbers. This is useful when holidays, pay periods, or planned staffing changes need to be reflected directly on the posted schedule.
If your rotation repeats on a cycle length that does not align well with 21 days, you can expand the grid by adding day columns to the right. After adding columns, extend the conditional formatting and the Hours formula range so the colors and totals continue through the added days.
To add more teams, copy an existing team row and paste it below the last team so the formatting and formulas carry over. Then rename the team label and adjust the shift blocks as needed. If you only run two shifts, remove the unused shift from the legend and use only the two shift entries in the schedule area.
In Word and Google Docs, the same 21 day grid is set up as a formatted table. This version is best when you want a stable schedule to print, post, or share as a reference. You can type the shift entries into the cells and apply shading to match the legend. If you need a longer rotation, duplicate the table and continue the day labels so the pattern stays readable.
Warping Up
This template is designed for planning rotating 10 hour coverage across multiple teams using a clear 21 day cycle. Once the rotation is set, you can use the grid for weekly staffing reviews, shift swap planning, onboarding, and posted schedules for the floor.
This template is available in Excel, Google Sheets, Word, and Google Docs. Use the spreadsheet version when you want drop downs, automatic color fills, and hour totals that update as you edit. Use the document version when you want a printable schedule that stays stable during review and approvals.