
Construction planning begins with seeing the whole job before work starts on site. That means defining the scope, reviewing site conditions, setting the budget, identifying permits and inspections, assigning responsibility, and building a schedule that matches the work. It should also cover procurement, safety, and environmental requirements so the project starts with stronger direction and better coordination. This guide walks through how to plan a construction project step by step.

Steps to Plan a Construction Project
Decide what the project needs to accomplish –
Start by writing down the finished result in direct terms. This sets the direction for pricing, drawings, permits, scheduling, and contractor review. Keep the project description plain and specific so anyone reading it can understand what is being built, repaired, renovated, or installed.
A good starting point is to describe the final outcome and then name the main parts of the work. A room addition, for example, may include excavation, concrete work, framing, roofing, electrical work, plumbing, insulation, drywall, flooring, and painting. A commercial interior renovation may include demolition, partitions, ceilings, lighting, mechanical work, finishes, and code-related upgrades. Once the scope is written down in full, the rest of the planning work has a stronger starting point.
- Project goal. Write the finished result in direct terms so the job has a defined outcome.
- Main work items. List the major parts of the construction work so the full job is visible from the start.
- Project limits. Record what is outside the current job so pricing and contractor expectations stay tied to the same scope.
- Owner requirements. Add important conditions such as deadline targets, access limits, work-hour limits, or spaces that must stay in use during construction.
Review the site before making schedule and budget decisions –
The site affects nearly every part of the project. It influences deliveries, equipment access, worker movement, drainage, storage space, utility coordination, and safety planning. A site review should happen early so the plan reflects the actual working conditions.
Walk the site and look closely at the ground, access points, surrounding buildings, traffic flow, utility connections, overhead lines, drainage paths, and the amount of room available for staging materials and equipment. If the project is inside an existing building, check entrances, hallways, service rooms, shutoff points, ceiling spaces, and occupied areas that may need protection. If excavation is part of the job, review ground conditions, trench depth, nearby utilities, and water buildup risk before field work is planned.
- Access points. Check how workers, trucks, equipment, and deliveries will enter and leave the site.
- Work area. Review how much room is available for materials, equipment, dumpsters, trailers, and temporary facilities.
- Utility conditions. Check electric, gas, water, sewer, and communication lines that may affect the job.
- Ground conditions. Record slopes, drainage paths, soil concerns, and any point that may affect excavation or grading.
- Nearby activity. Note sidewalks, traffic lanes, neighboring properties, tenants, or occupied spaces that may affect site operations.
Build a budget that covers the full project –
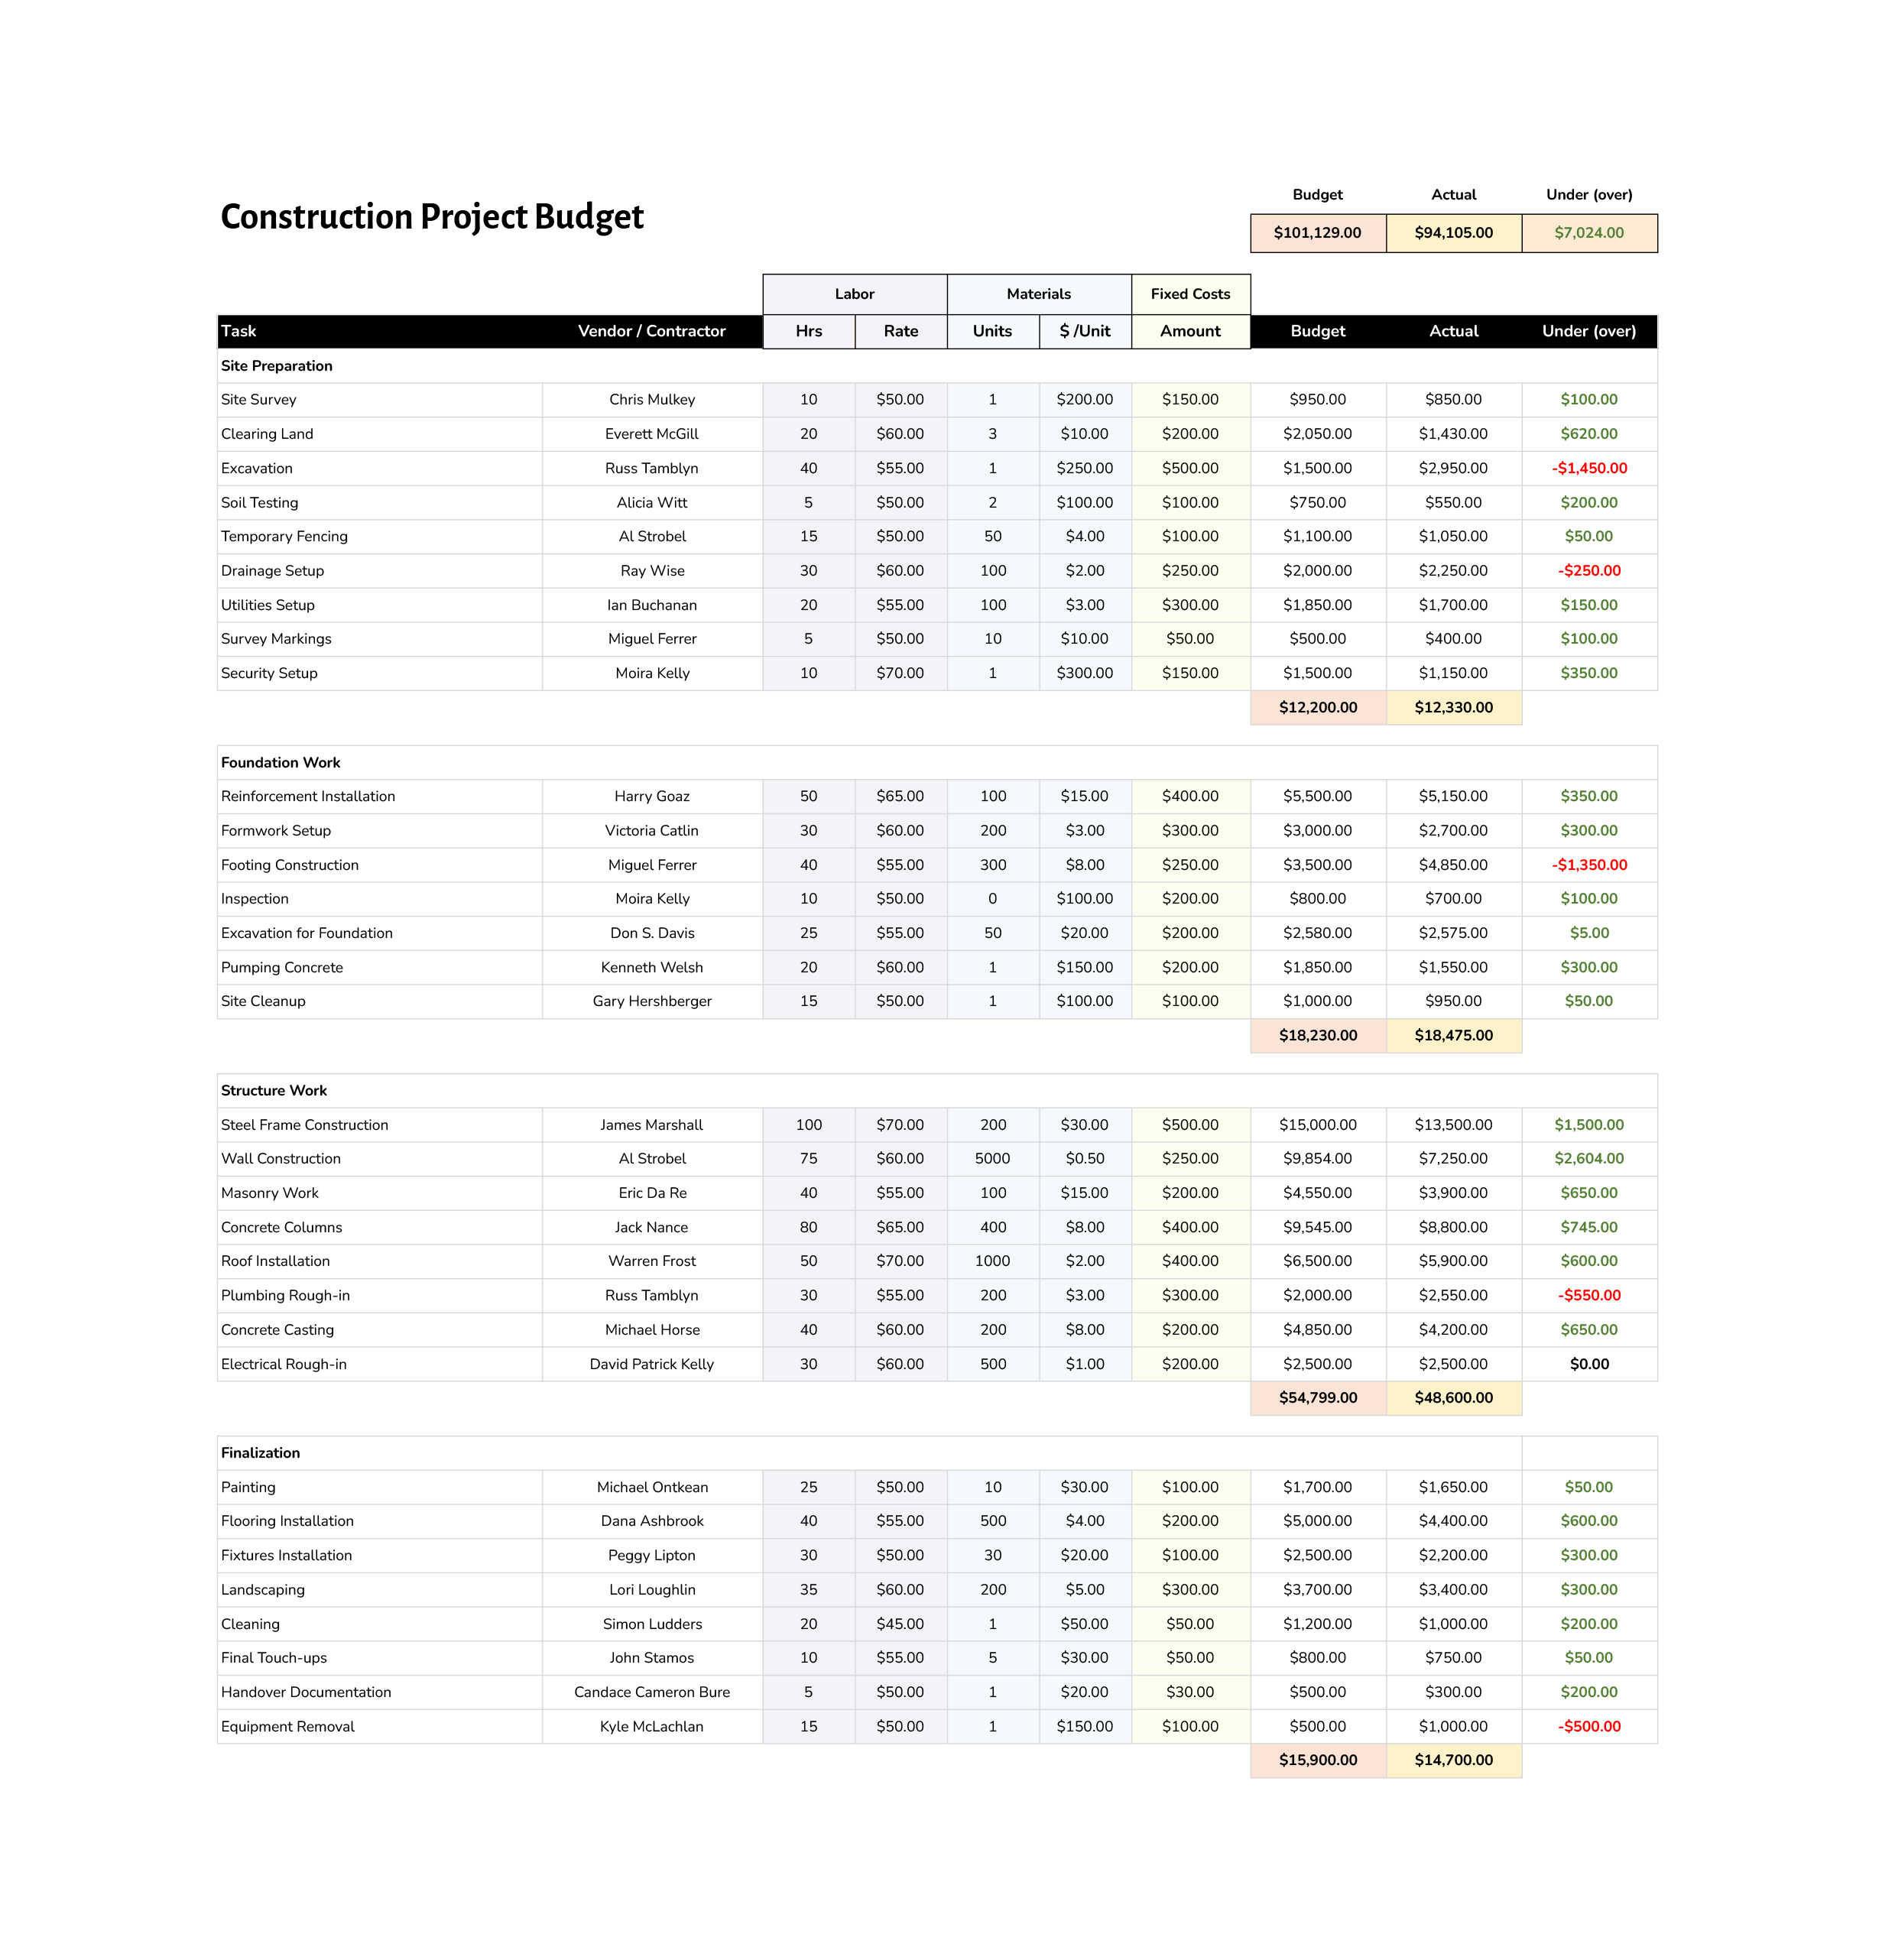
A construction budget should cover more than labor and materials. It should reflect the full cost of getting the project completed, including direct work, temporary site items, consultant costs, permit fees, testing, waste removal, safety items, and closeout work. When the budget is built in enough detail, it becomes easier to review bids, manage changes, and check funding before work begins.
Start with the major trade costs. After that, add the items that often get left out during early planning, such as surveys, design fees, site fencing, temporary power, temporary water, portable toilets, dumpsters, equipment rental, cleanup, and contingency. A project can begin with a solid number for trade work and still run into trouble later if these surrounding costs are missing.
- Direct construction cost. Record labor, materials, subcontractors, and major installed items.
- Consultant and planning cost. Add design, survey, soil review, testing, and specialist review if the job needs them.
- Temporary site cost. Include fencing, site office space, temporary utilities, waste bins, and traffic control.
- Permit and approval cost. Add permit fees, inspection-related expenses, and review charges tied to the job.
- Contingency. Set aside an amount for site discoveries, price movement, or design questions that may come up during construction.
- Payment timing. Note when deposits, material orders, mobilization payments, and phase payments may be due.
Turn the scope into drawings and written work details –
Once the scope and budget are taking shape, put the work into drawings and written instructions. This gives contractors, consultants, and owners a stronger basis for pricing, review, and execution. The project should be described in enough detail that the team understands what is being built and how it should be finished.
The level of detail will depend on the size of the job. A smaller residential project may rely on basic plans, finish notes, and trade descriptions. A larger project may need full drawings, specifications, schedules, and product requirements. Keep a written list of the main work items and any open decisions that still need approval so those items stay visible during planning.
- Drawings. Prepare plans, elevations, sections, and details needed for the job.
- Material notes. Record product types, finishes, and installation requirements expected for the project.
- Work list. Keep a written list of the main work items so everyone is referring to the same job description.
- Open items log. Record finish selections, product questions, and technical decisions that still need review.
- Coordination check. Review the drawings and written notes together so they describe the same work.
Check permits, code items, and inspections –
Permit review should be part of planning from the start. Construction work may need building permits, trade permits, utility approvals, street or right-of-way permissions, demolition permits, grading permits, or site-related environmental review. Inspection timing should also be considered early because those checkpoints can affect the schedule.
Make a list of the permits the project may need and check which department handles each one. Record likely review times, required documents, and inspection stages tied to the work. If the project includes earth disturbance, drainage changes, demolition, utility work, or exterior improvements, add those items to the permit review too.
- Permit list. Write down each permit or approval the project may need.
- Review offices. Record which department or agency handles each permit.
- Required documents. Note the drawings, forms, calculations, and site information needed for submission.
- Inspection points. Record likely inspections such as footing, framing, rough-in, final, or site-related checks.
- Environmental review. Add stormwater, erosion, hazardous material, or site protection items if the project includes land disturbance or demolition.
Choose the people who will handle each part of the job –
A construction project is easier to manage when responsibilities are assigned early. Planning should identify who is designing the work, who is pricing it, who will manage the site, who will review submittals, who will answer technical questions, and who will approve budget or scope changes.
This step also covers the contract path. The project may move through a general contractor, a construction manager, direct trade contracts, or a design-build setup. That decision affects bidding, insurance, communication, payment flow, and site supervision. Once these roles are set, the planning work is easier to manage because responsibility is visible.
- Owner role. Record who will approve budget items, design selections, schedule changes, and major field decisions.
- Design role. Record who will prepare drawings, respond to technical questions, and review revisions.
- Contractor role. Decide who will manage field work, site labor, trade coordination, and procurement.
- Consultant role. Add surveyors, testing agencies, code reviewers, or specialty consultants if needed.
- Contract method. Decide how the job will be procured and who will hold the main construction responsibility.
Build the construction schedule before work begins –
A construction schedule should show the full path of the job from preconstruction through turnover. It should include design completion, permit review, bidding, contractor selection, material ordering, submittals, mobilization, field phases, inspections, punch work, and final completion.
This is a good place to use a construction schedule template in Excel. It can keep major dates visible during planning and make it easier to review trade durations, permit timing, procurement deadlines, inspections, and owner decisions. The schedule should reflect the order the work needs to happen, not just a list of dates.
- Preconstruction dates. Add design finish, permit submission, review periods, bidding, award, and contract signing.
- Procurement dates. Record material approval, order dates, fabrication time, delivery dates, and any long-lead items.
- Field sequence. List the order of work such as demolition, site prep, foundation, framing, enclosure, rough-in, finishes, startup, and final work.
- Inspection timing. Add the inspections that need to happen during major phases of the job.
- Owner decisions. Include selection and approval dates that affect ordering or field progress.
- Time reserve. Leave room for weather, review delays, site discoveries, and correction work when needed.
Plan site logistics and worker safety before mobilization –
Construction planning should include how the site will function once work begins. That means deciding where deliveries will go, where materials will be placed, how workers will move through the site, how emergency access will be maintained, and what protective measures are needed for people, equipment, and nearby property.
This step also covers safety planning. Record access routes, temporary barriers, emergency contacts, first-aid access, utility shutoff plans, excavation review, and any protective systems tied to the work. If the site remains occupied during construction, add dust control, noise planning, temporary paths, and separation between workers and building users.
- Delivery and access routes. Mark how trucks, workers, and equipment will enter, move through, and leave the site.
- Material staging. Decide where materials, trailers, dumpsters, and equipment will be placed during each phase.
- Utility control. Record marking, shutoff, protection, relocation, and temporary service plans.
- Worker protection. List safety barriers, fall protection, trench review, signage, egress routes, and emergency response items tied to the job.
- Occupied-site planning. Add dust protection, temporary paths, work-hour limits, and noise control if others will remain in the area.
Set up the project records –
Construction work produces daily decisions, revisions, inspections, deliveries, approvals, and questions. The project record should be planned before the first day on site so those items are tracked from the beginning. This includes daily reports, meeting notes, change records, submittal logs, request logs, test results, and closeout records.
A written record makes it easier to review progress, explain costs, handle changes, and prepare for final turnover. It also reduces confusion later because the team can look back at what was submitted, approved, installed, or revised during the job.
- Submittal list. Record product data, shop drawings, samples, and mockups that need review before installation.
- Question log. Track technical questions and their answers during planning and construction.
- Change record. Record field changes, added work, revised quantities, and approval dates.
- Daily notes. Decide who will record labor count, weather, deliveries, incidents, and major site activity.
- Testing and inspection records. Keep a place for test reports, inspection results, and correction notices.
- Closeout items. Plan for warranties, manuals, final training, punch lists, and turnover records early.
Compare bids before choosing the contractor –
Once the drawings, scope notes, and schedule expectations are ready, the next planning step is comparing contractors. The review should cover more than price. A construction project also depends on experience, licensing, insurance, schedule capacity, communication, and the contractor’s understanding of the work involved.
Ask each bidder to price the same scope so the comparison stays fair. Review what is included, what is excluded, how long the work is expected to take, and which items are still listed as allowances or pending decisions. A lower price deserves a closer review if it sits far below the rest.
- Bid comparison. Review each contractor against the same drawings, scope list, and schedule targets.
- Included work. Check what each bid covers so pricing differences make sense.
- Excluded work. Look for items that were left out, since these can later become added cost.
- Qualifications. Review experience, license status, insurance, and the contractor’s background with similar work.
- Schedule capacity. Confirm the contractor can begin and finish the job within the expected time frame.
- Reference review. Speak with past clients or review recent projects if the job is large enough to justify it.
Set the payment plan and change process before work starts –
Construction planning should also cover how payments will be handled and how revised work will be approved. This part is easy to overlook early, yet it becomes very important once the project is active. A written payment plan keeps expectations organized. A written change process keeps added work from moving ahead without cost and schedule review.
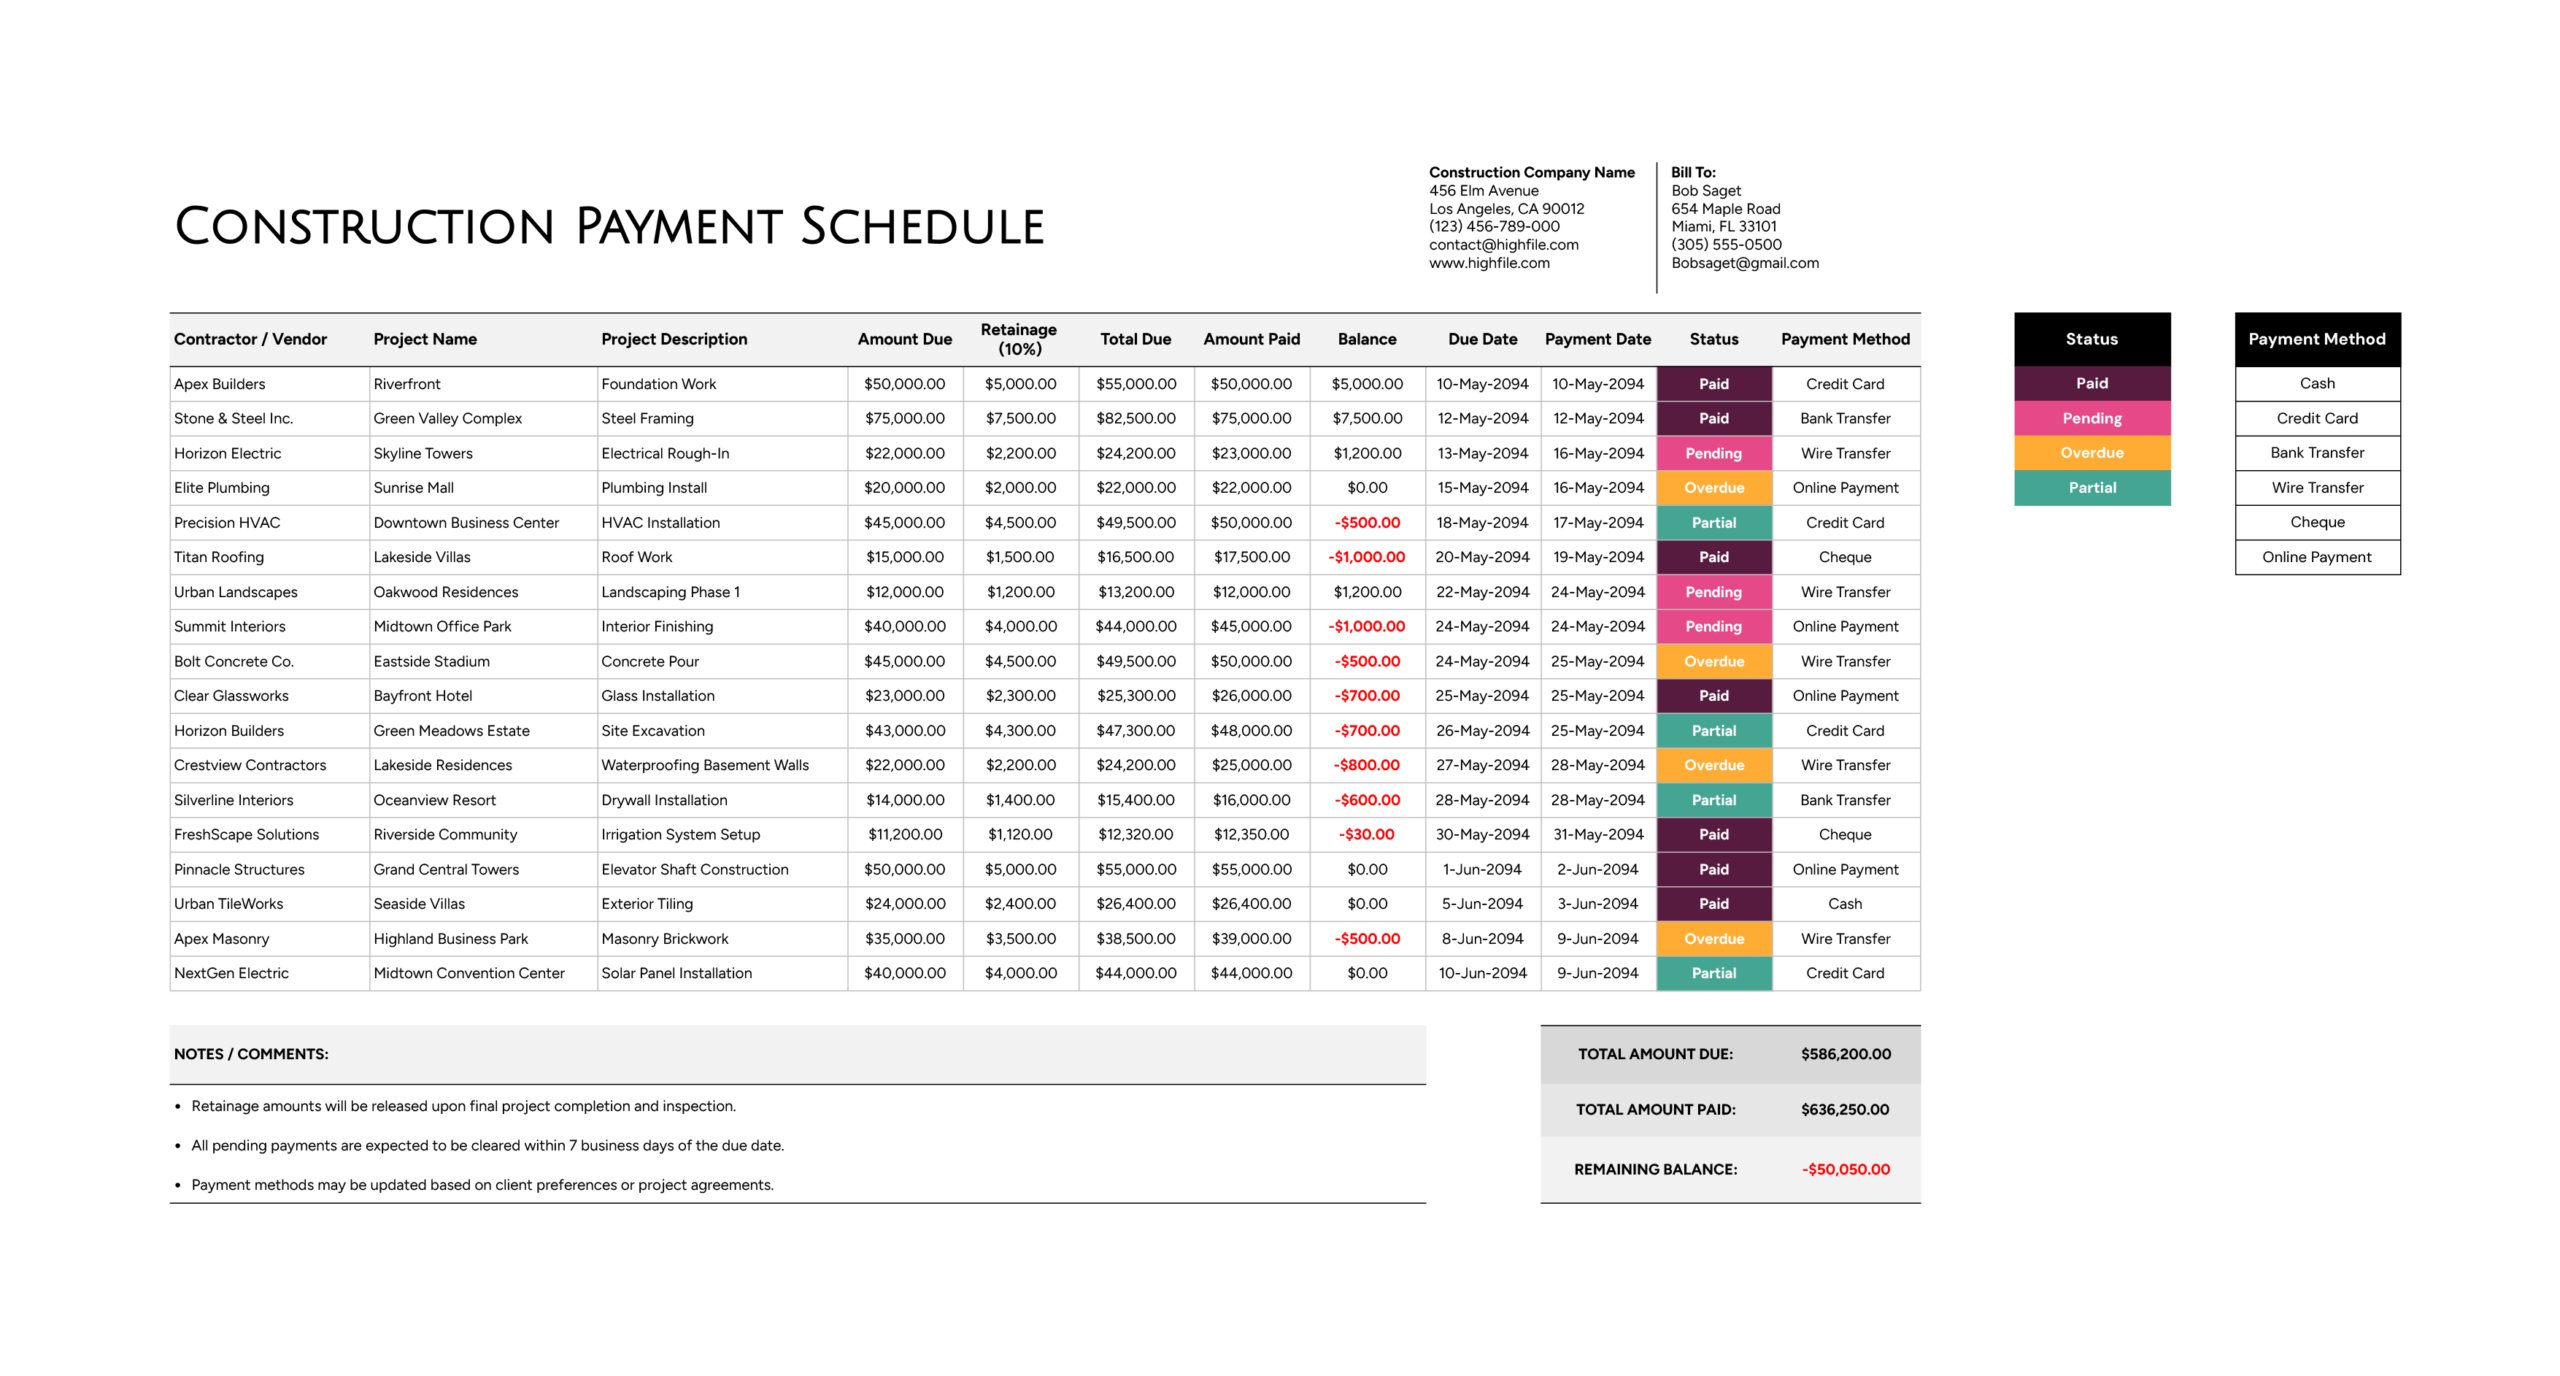
Decide how the contractor will bill the job. That may be a deposit, monthly billing, milestone billing, or payments tied to completed phases. Then decide how revised work will be handled if the owner asks for extra work, if site conditions change, or if a product selection is revised after pricing.
- Payment schedule. Record when invoices will be submitted and what stage of work each payment covers.
- Backup records. Decide what the contractor must provide with each billing, such as progress notes or stored-material records.
- Retention. State if part of each payment will be held until later stages of the project.
- Change approval. Decide who approves added cost, added time, or scope revisions before that work begins.
- Written records. Keep all change pricing, approvals, and revised dates in writing.
Hold a preconstruction review –
Before the first day of field work, hold a meeting to review the full plan with the people responsible for the project. This should include the owner, contractor, designer, and any major trade or consultant tied to the job. The goal is to review the scope, schedule, permits, procurement, access, safety planning, inspection stages, and open decisions before site activity begins.
This meeting should end with a short action list. Each open item should have a responsible name and a due date. That keeps the planning work active and keeps important questions from being forgotten as the job moves into mobilization.
- Scope review. Confirm the work that will be performed and any limits tied to the project.
- Permit review. Check permit status, inspection expectations, and approval timing.
- Schedule review. Confirm start dates, major phases, procurement timing, and milestone dates.
- Safety and logistics review. Confirm access, staging, worker protection, emergency contacts, and utility coordination.
- Communication list. Record who receives updates, field questions, change requests, and urgent notices.
- Open items list. End the meeting with unresolved items, responsible names, and due dates.
Prepare for turnover before the job is near completion –
Planning should also cover what happens at the end of the job. This includes final inspections, punch-list work, cleaning, owner training, warranties, manuals, extra materials, keys, access devices, and final acceptance. When turnover is planned early, the closing stage of the project moves with better order.
A project can look nearly finished and still face delay at the end if closeout items are missing. That is why the final stage should already be part of the planning work before field labor begins.
- Final inspections. Record what must be approved before the project can close.
- Punch list. Decide how incomplete or corrective items will be recorded and finished.
- Training and handover. Plan any walkthrough, demonstration, or operating instruction the owner will need.
- Warranty records. Gather warranty papers, manuals, and product information before the final stage.
- Final acceptance. Decide what must happen before the owner signs off on completion.
Tips
- Visit the site early and take notes each time. Site access, utility locations, storage space, drainage, and nearby activity should be recorded before pricing and scheduling move ahead.
- Keep the written scope detailed enough for pricing and review. Contractors, consultants, and owners should be working from the same job description, drawings, and work list before bids are compared.
- Add temporary site costs to the budget from the start. Fencing, dumpsters, temporary utilities, traffic control, testing, and cleanup should be part of the planning budget.
- List long-lead materials before the schedule is finalized. Equipment and custom products with longer fabrication times can shift the field schedule if they are identified too late.
- Use a construction schedule template in Excel during preconstruction. It can keep permit dates, bid dates, procurement milestones, field phases, inspections, and turnover items visible during planning.
- Keep owner decisions on a running action list. Finish selections, product approvals, and scope questions should stay visible until each item is resolved and dated.
- Check underground and overhead utilities before excavation planning is finalized. Utility location should be confirmed before digging, trench work, or equipment movement is scheduled.
- Review the safety plan with the field team before mobilization. Access routes, protective systems, emergency contacts, and occupied-site controls should be reviewed before labor arrives on site.
Important
- Do not move into bidding with a loose scope. Pricing becomes harder to compare when drawings, notes, alternates, and work boundaries do not match the same job description.
- Do not leave permit review until the field start date is close. Permit timing, review periods, required documents, and inspections can affect mobilization and trade sequencing.
- Do not leave safety planning for the first day on site. Utility checks, excavation review, emergency response, and worker protection belong in preconstruction planning.
- Do not compare bids line by line unless each contractor priced the same scope. Bid review is stronger when the work description, schedule expectations, exclusions, and alternates are aligned before comparison.
- Do not leave change procedures undefined. Cost and schedule records stay stronger when revised work, added quantities, and owner-requested changes are documented and approved in writing.
- Do not treat an occupied site like an empty site. Access routes, work-hour limits, dust protection, noise control, and temporary separations should be part of the planning stage when people will remain in or around the property during construction.
FAQs
A construction budget should cover direct construction cost, consultant or design cost, temporary site items, permit fees, testing, waste removal, contingency, and closeout items. It should reflect the full cost of getting the project completed, not just the visible trade work.
Site conditions affect access, storage, equipment movement, excavation planning, utility coordination, drainage, and worker safety. Those conditions can change pricing, sequencing, and permit planning, so they should be reviewed early in the planning stage.
Yes. Excel templates can be used for the construction schedule, planning budget, procurement list, permit checklist, and submittal tracking. They are especially useful during preconstruction when the team is reviewing major dates, trade phases, and open action items.
A preconstruction meeting should review the approved scope, permit status, procurement, start dates, site access, delivery routes, safety planning, utility coordination, inspections, and open items that still need action before crews arrive.
References
- GSA Cost and Schedule Management Policy
https://www.gsa.gov/directives-library/p120-public-buildings…
General guide on cost planning, schedule planning, baseline development, and project controls during planning, design, and construction. - OSHA Recommended Practices for Safety and Health Programs in Construction
https://www.osha.gov/sites/default/files/publications/OSHA3886.pdf
General guide on construction safety planning, hazard review, corrective action, and worksite safety program development. - EPA Stormwater Discharges from Construction Activities
https://www.epa.gov/npdes/stormwater-discharges-construction-activities
General guide on construction-related stormwater permit requirements, land-disturbance thresholds, and runoff control obligations. - GAO Schedule Assessment Guide
https://www.gao.gov/assets/690/687052.pdf
General guide on schedule logic, milestone relationships, dependencies, and schedule review during project planning and execution. - GAO Cost Estimating and Assessment Guide
https://www.gao.gov/assets/gao-20-195g.pdf
General guide on cost estimating, budget planning, and cost review methods used in project control. - SBA Surety Bonds
https://www.sba.gov/funding-programs/surety-bonds
General guide on bid, payment, and performance bonds used in contract work, including construction projects.