

Loop scheduling can be a practical choice when your homeschool week changes often. Instead of assigning every subject to a fixed day, you keep a small set of daily priorities, then cycle through the remaining subjects in order as time opens up. This loop homeschool schedule template is designed for that approach, so you can plan the week without constantly rewriting your schedule when a lesson takes longer, an appointment comes up, or you need to slow the pace.
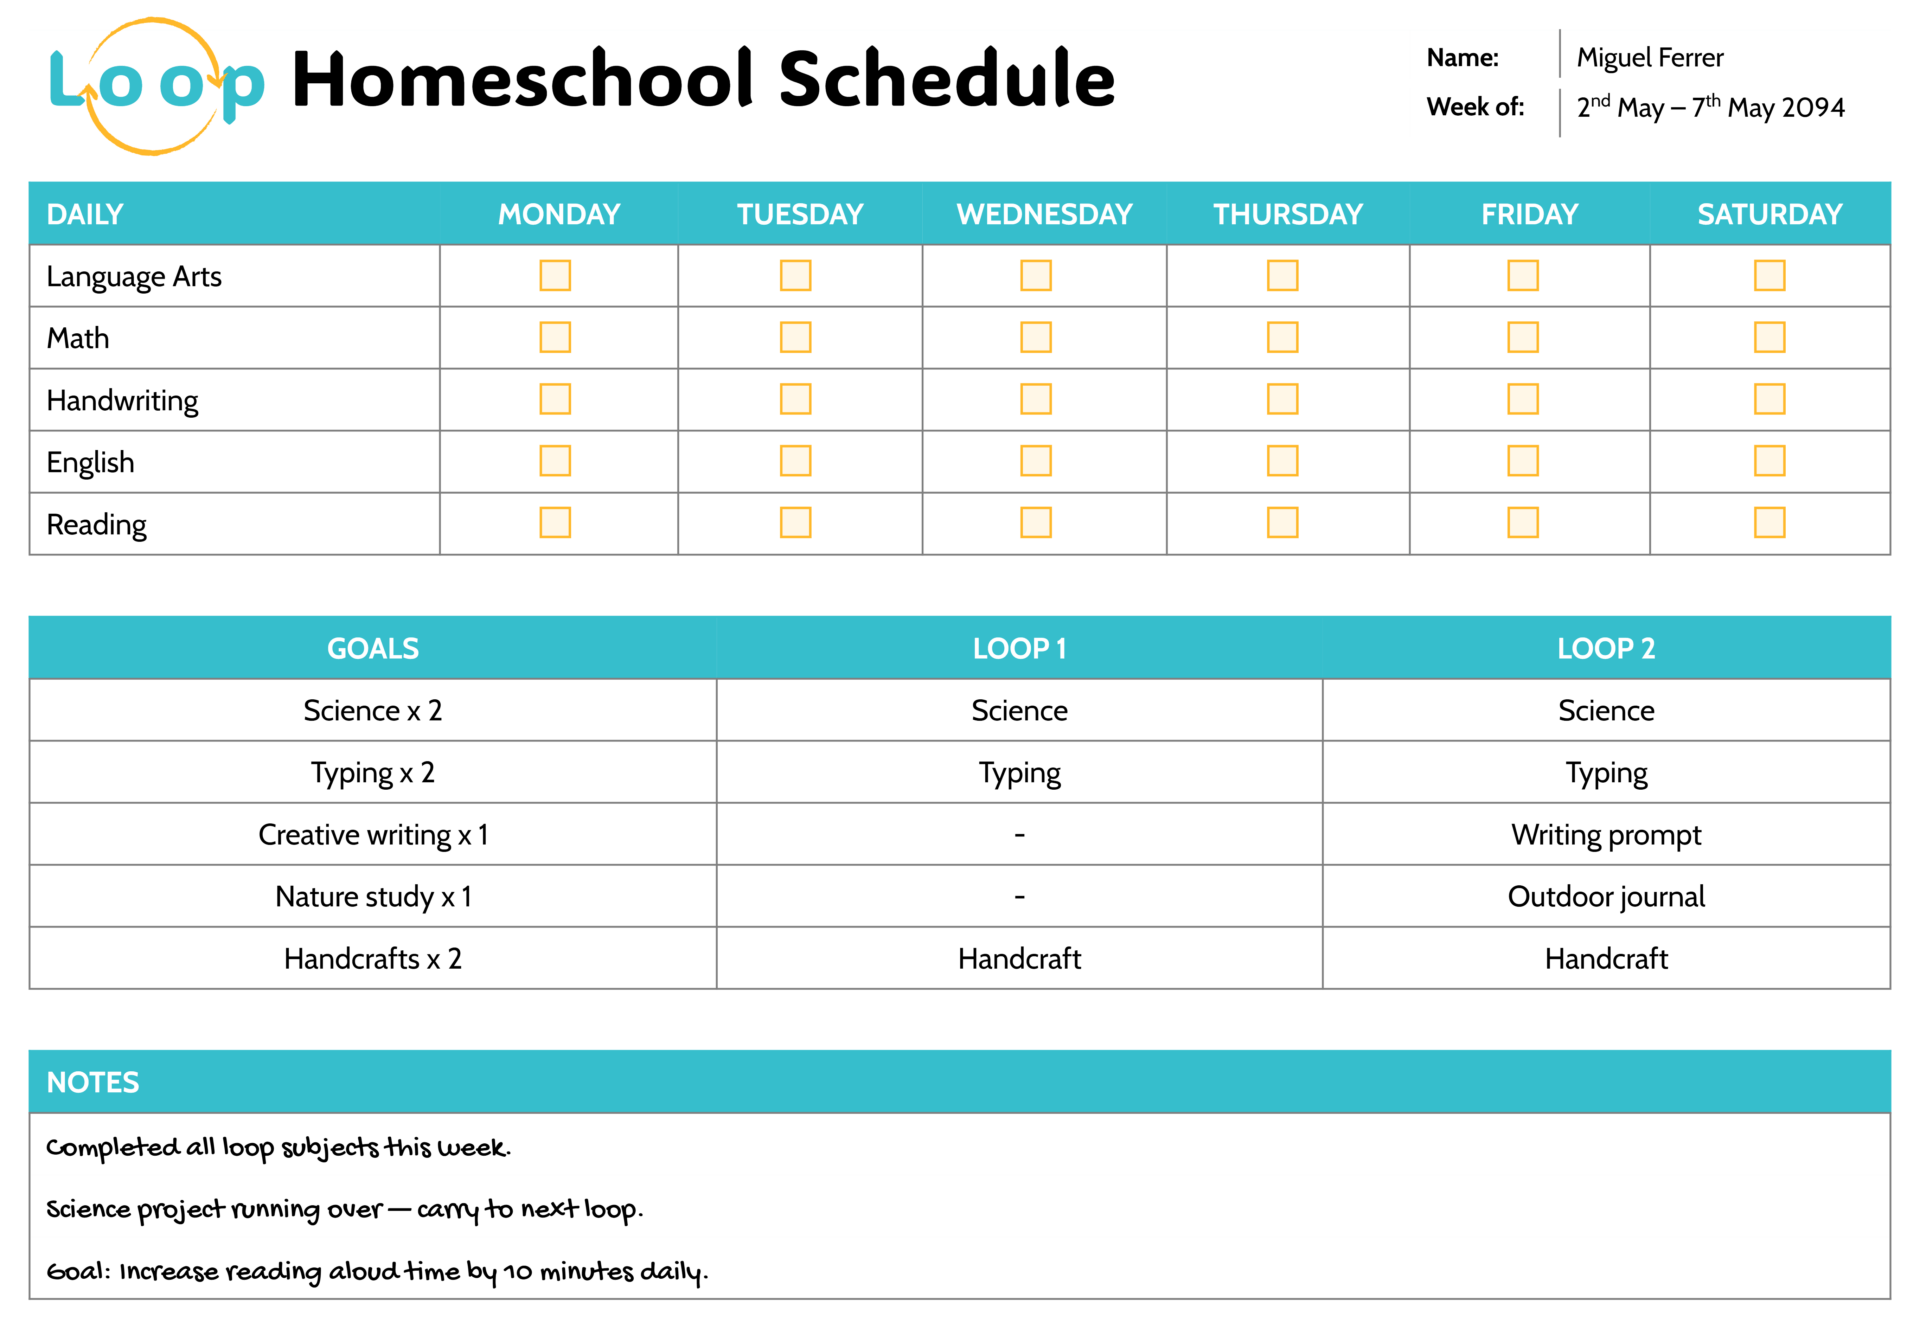
At the top, you can enter the student name and the week range so each weekly copy stays easy to file and revisit. The main weekly grid is built for daily subjects that you want to touch regularly. You list those subjects once, then mark completion across the week using the checkboxes under each day. This makes it easy to see what was covered without turning the page into a full lesson plan.
How To Use
Start by updating the student name and the week range. If you keep weekly records for planning or reporting, saving a fresh copy each week creates a useful history of pacing and workload.
Next, edit the daily subject list to match your true essentials. Keep this list short and realistic, since the daily list is meant for subjects you want to prioritize even on busy days. Use the checkboxes as completion marks, or use them as “covered today” marks if the same subject can happen more than once in the week.
When the daily list becomes too long, the loop portion usually gets pushed aside. A shorter daily list keeps the loop system useful.
After that, move to the goals table. This is where you set weekly targets for subjects that do not need a fixed day but still need regular attention. The “x 1” and “x 2” style targets can be edited to match your routine. If you want more science in a given week, raise the count. If you want to protect time for an elective, add it here with a realistic weekly target.
Then fill in Loop 1 and Loop 2 with the next sessions you plan to complete. Keep these entries specific, so you can start without additional planning. Instead of writing only a subject name, write the next action, such as the chapter, worksheet, lab, project step, or a short time-based target.
A strong loop entry includes a clear start and stop point, such as “Typing, 15 minutes,” “Science lesson 6,” or “Outdoor journal, one page.” Clear endpoints make it easier to move forward when the day is short.
As you move through the week, the loop section functions like a queue. When you finish the first loop item, continue to the next item rather than rearranging the whole week. If you do not reach everything, record the stopping point in the notes section so it can carry into the next week with context.
Keeping the Loop System Practical
The benefit of loop planning is that progress continues even when the week does not. Daily priorities stay visible, and rotating subjects keep moving in order instead of getting skipped repeatedly. On a lighter day, you move further through the loop. On a heavier day, you still protect the essentials and continue the loop later without losing your place.
If you want a steadier rhythm across weeks, keep the daily list mostly unchanged and rotate loop items week to week. That keeps core learning predictable while still giving room for projects, enrichment, and subjects that do not need daily time.
FAQs
Put subjects in the daily list when you want them touched most days, even when time is limited. If a subject is important but does not need daily time, place it in the goals and loops instead. A simple check is to look at what keeps getting postponed. If it keeps getting postponed, it likely needs a stronger position either in the daily list or with a higher weekly goal.
Use the two loop columns as the next two sessions in your rotation. If you prefer a single loop, keep Loop 1 as your main queue and use Loop 2 as overflow for follow-ups, review, or a second session for the same subject. If you plan certain subjects twice in a week, Loop 1 can hold the first session and Loop 2 can hold the second session.
Keep it and write the exact stopping point in the notes section, so it is easy to restart. In the next week’s copy, move that unfinished item to the first open loop slot and continue from the saved stopping point. This prevents repeating work or forgetting where you left off.
Yes. Keep a separate weekly copy per child so the daily checkmarks and loop order stay clear. If you coordinate shared subjects, write the same loop topic for both children and keep the level-specific details in your lesson notes.