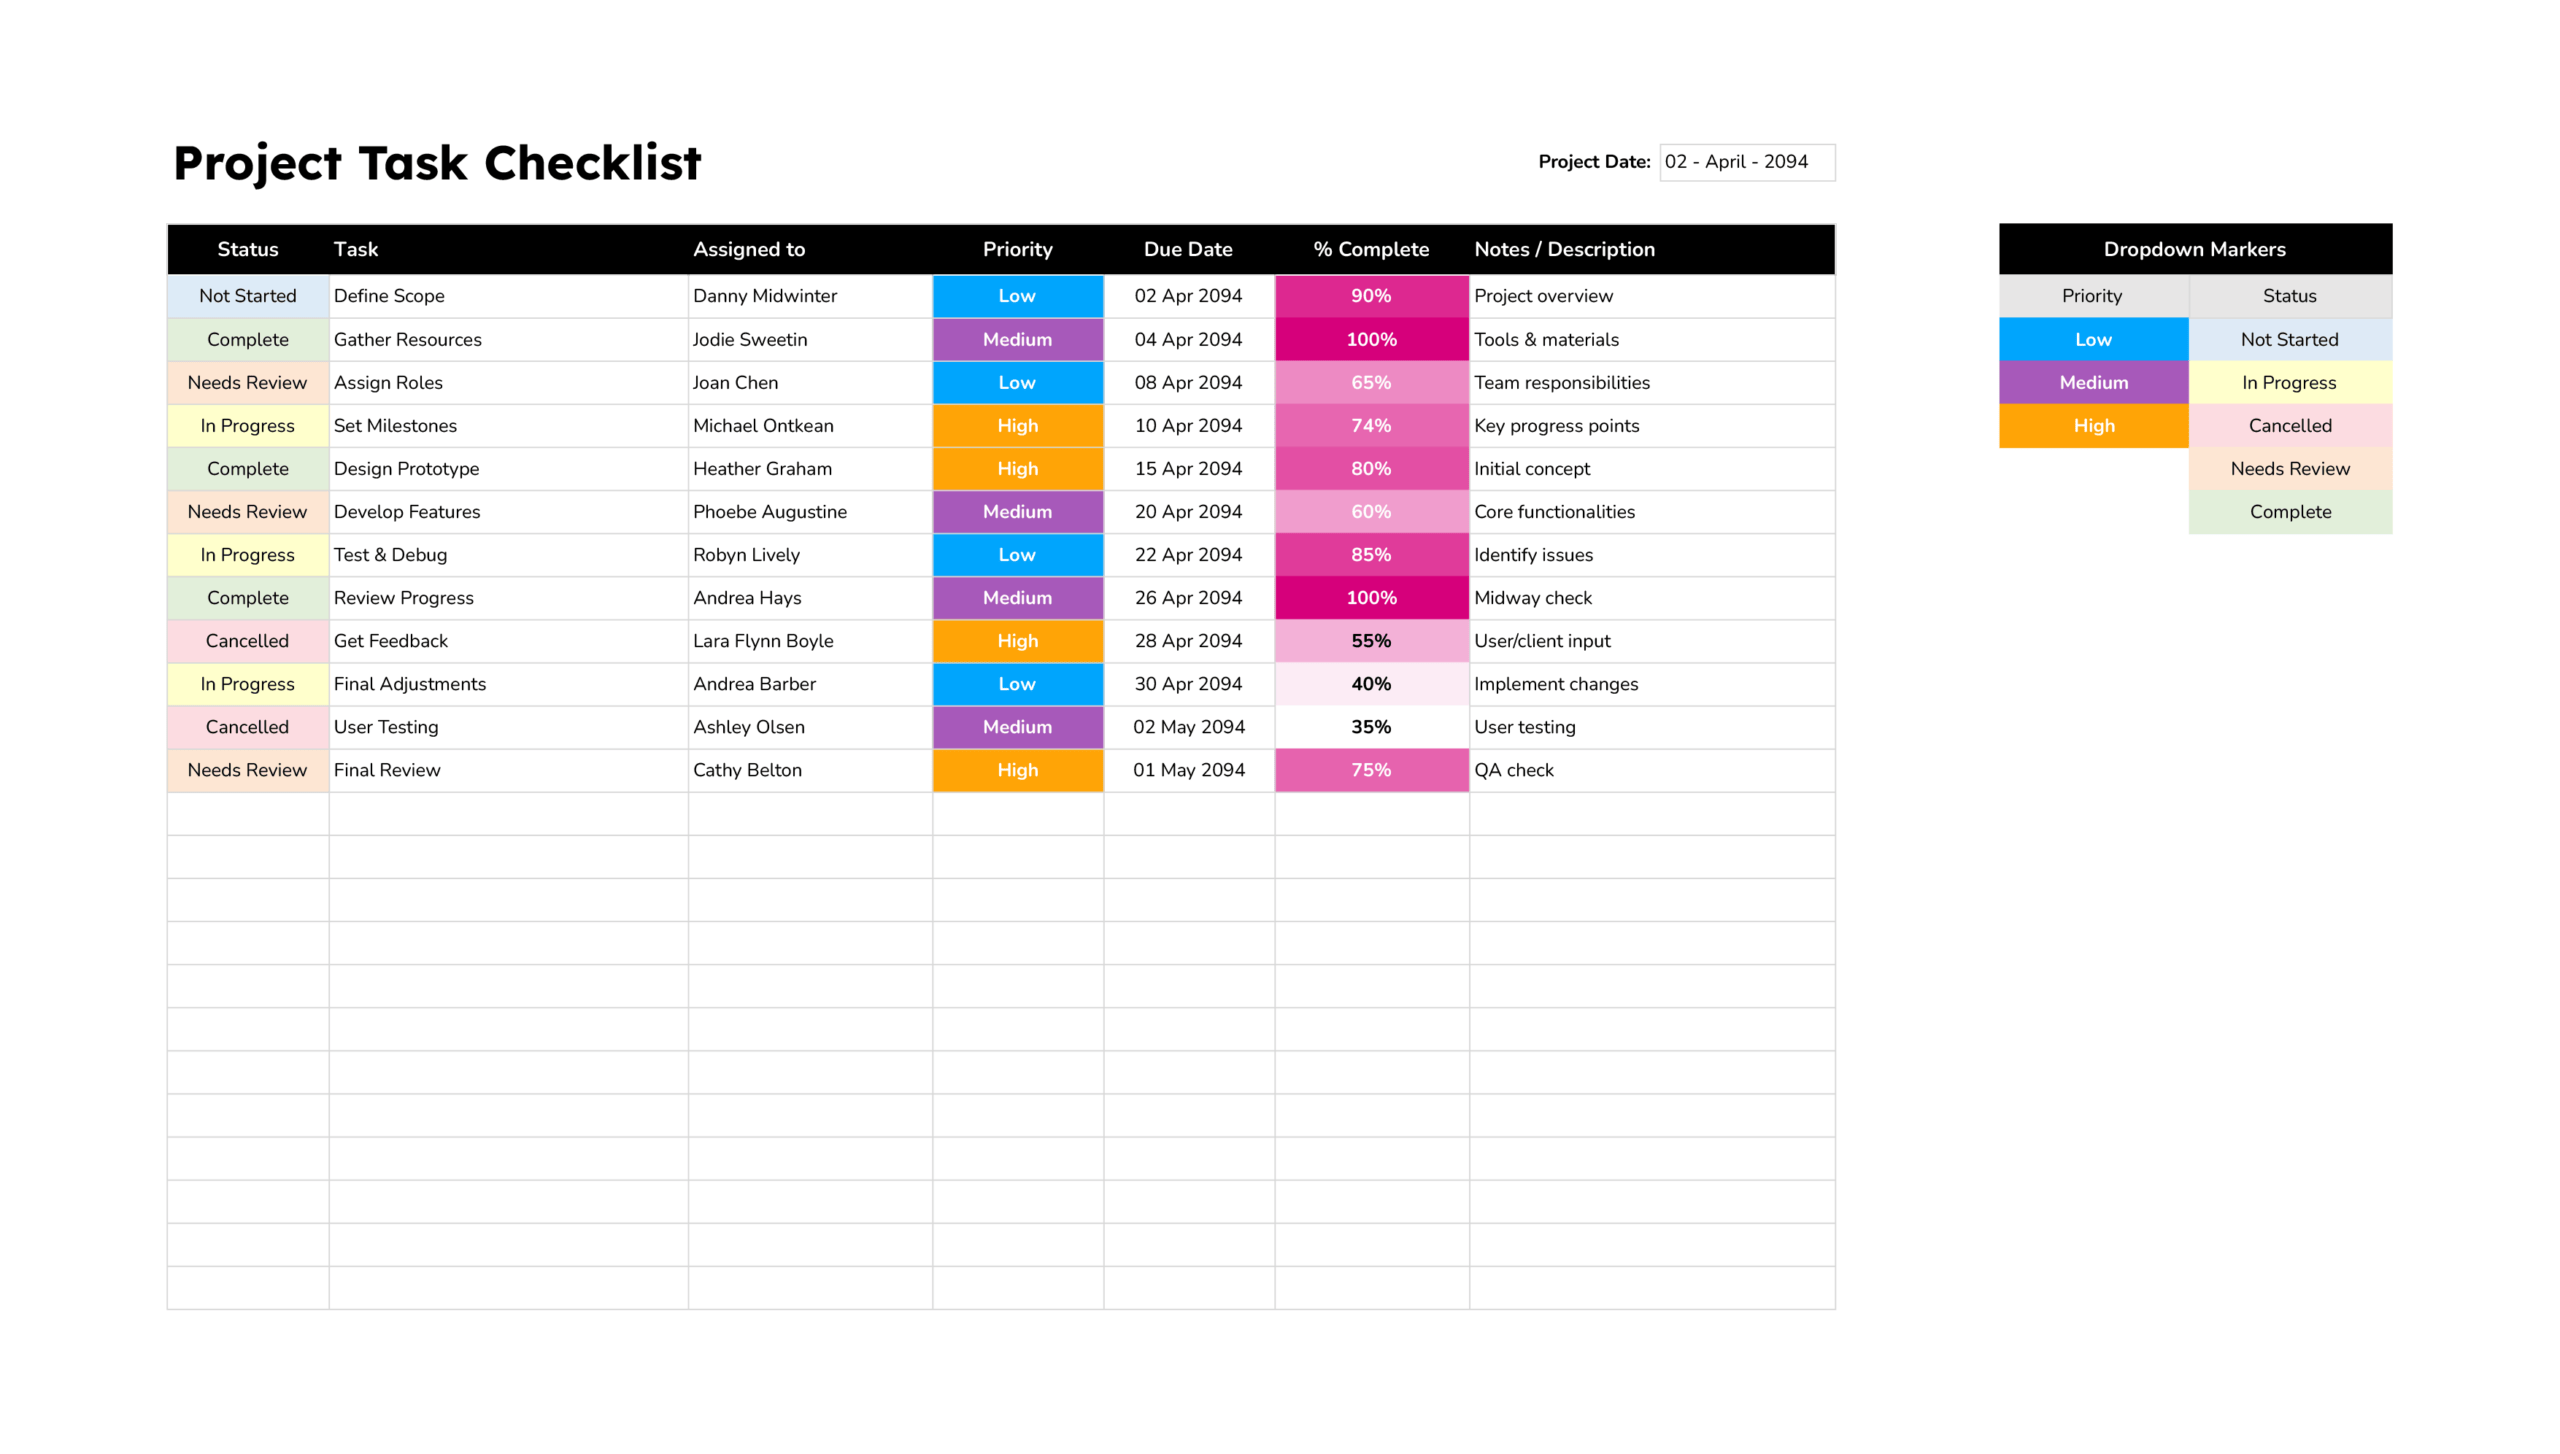


The project task checklist template is designed for project managers, team leads, and freelancers who want a single view of day-to-day work for a project. It works well for short and medium projects, sprint cycles, or campaign plans where you need to see task ownership, deadlines, and progress in a simple table instead of a full project system.
Each row represents one task with columns for status, task name, assigned person, priority, due date, completion percentage, and notes or description. Priority and status use colour-coded dropdowns so you can scan the list and immediately see which items are not started, in progress, cancelled, under review, or complete, and which ones are low, medium, or high priority.
How To Use This Project Task Checklist Template
The template is a flat task list without phases or WBS codes. You focus on individual tasks and keep them updated as the project moves forward.
Step 1. Enter Project Date
Use the “Project Date” field at the top to record the start date of the project or the current review date. This gives everyone a reference point when they view or print the sheet and tells you which version of the checklist you are looking at.
Step 2. List Tasks and Assign Work
In the “Task” column, describe each piece of work in clear, action-focused language such as “Define scope,” “Develop prototype,” or “User testing.” Avoid vague labels so anyone reading the list can understand what completion means for that task.
Use the “Assigned to” column for the person responsible for seeing the task through to completion. For shared tasks, you can add a team name or two names, but it is usually better to pick one primary owner so accountability remains clear.
Step 3. Set Priority and Due Dates
Choose “Priority” levels (Low, Medium, High) to indicate importance relative to other tasks. Treat priority as impact on the project rather than perceived urgency. A high-priority task is something that affects milestones, client commitments, or critical quality targets; low-priority work can move if timelines change.
Enter a “Due Date” for each task. For tasks that span several days or weeks, use the date by which the main work should be finished or the checkpoint when progress will be reviewed. This column becomes the reference when you sort the sheet by dates or when you decide what must be completed before the next meeting.
Step 4. Track Progress and Notes
Use “% Complete” to record how far along the task is. Many teams use simple steps such as 0%, 25%, 50%, 75%, and 100%. You can be more granular if you wish, as long as people use the same scale. Updating this field before reviews gives you a quick visual of work that is nearly done versus tasks that have barely started.
The “Notes / Description” column is the place for short updates and context. Examples include “Waiting for client feedback,” “Dependency on API update,” or “Scope reduced after discussion.” Over time, this becomes a lightweight history of why certain tasks slipped, changed, or completed early.
Begin notes with brief tags such as “Blocker –”, “Update –”, or “Decision –” so important comments stand out when you scan the column.
Step 5. Use Status and Colour Coding
The “Status” column describes the current state of each task, for example Not Started, In Progress, Cancelled, Needs Review, or Complete. Status values are linked to conditional formatting and dropdown markers. When you select a status from the dropdown, the cell automatically picks up the matching colour from the legend, turning the list into a quick visual map of progress.
Priority uses a similar approach. Each priority level has its own colour band, which makes urgent work easy to spot among lower-priority items.
If you want to customise these settings, you can edit the data validation lists for Priority and Status, then open the conditional formatting rules and change which colours are tied to each label. Once the labels and rules match, any task that uses those values will display the updated colour scheme.
Step 6. Use the Checklist in Daily Work
At the start of a project or sprint, enter the full list of tasks, assign owners, choose priorities, and set due dates. During execution, keep the sheet open in stand-ups or weekly check-ins. Before each discussion, update Status, % Complete, and Notes so the conversation focuses on the latest information rather than guessing.
You can sort by Due Date to see what is coming up next, filter by Status to look only at In Progress or Needs Review work, or filter by Assigned to when you want to look at one person’s workload. At the end of the project, you can archive the file as a record or duplicate it and clear the rows to create a clean starting point for the next project.
FAQs
Status is best for describing the stage of a task in plain language such as Not Started, In Progress, or Complete. % Complete is useful when you want a rough measure of how far along that work is inside the “In Progress” stage. A task might be In Progress at 20% one week and still In Progress at 80% the next, so keeping both fields updated gives a fuller picture during reviews.
Keep each row for a task that is meaningful on its own. If several small actions always happen together, combine them into a single task with a clear outcome. When the list grows, use filters to focus on high-priority or overdue items instead of scrolling through everything. Archiving completed rows to another sheet after a milestone can also keep the main checklist focused on current work.
After one cycle finishes, duplicate the sheet within the same workbook and rename the copy for the next week or sprint. Clear the % Complete, Notes, and Status values, keep the task names if they repeat, and adjust due dates as needed. Over time, each tab becomes a record of a specific cycle, and you still work in a familiar layout.