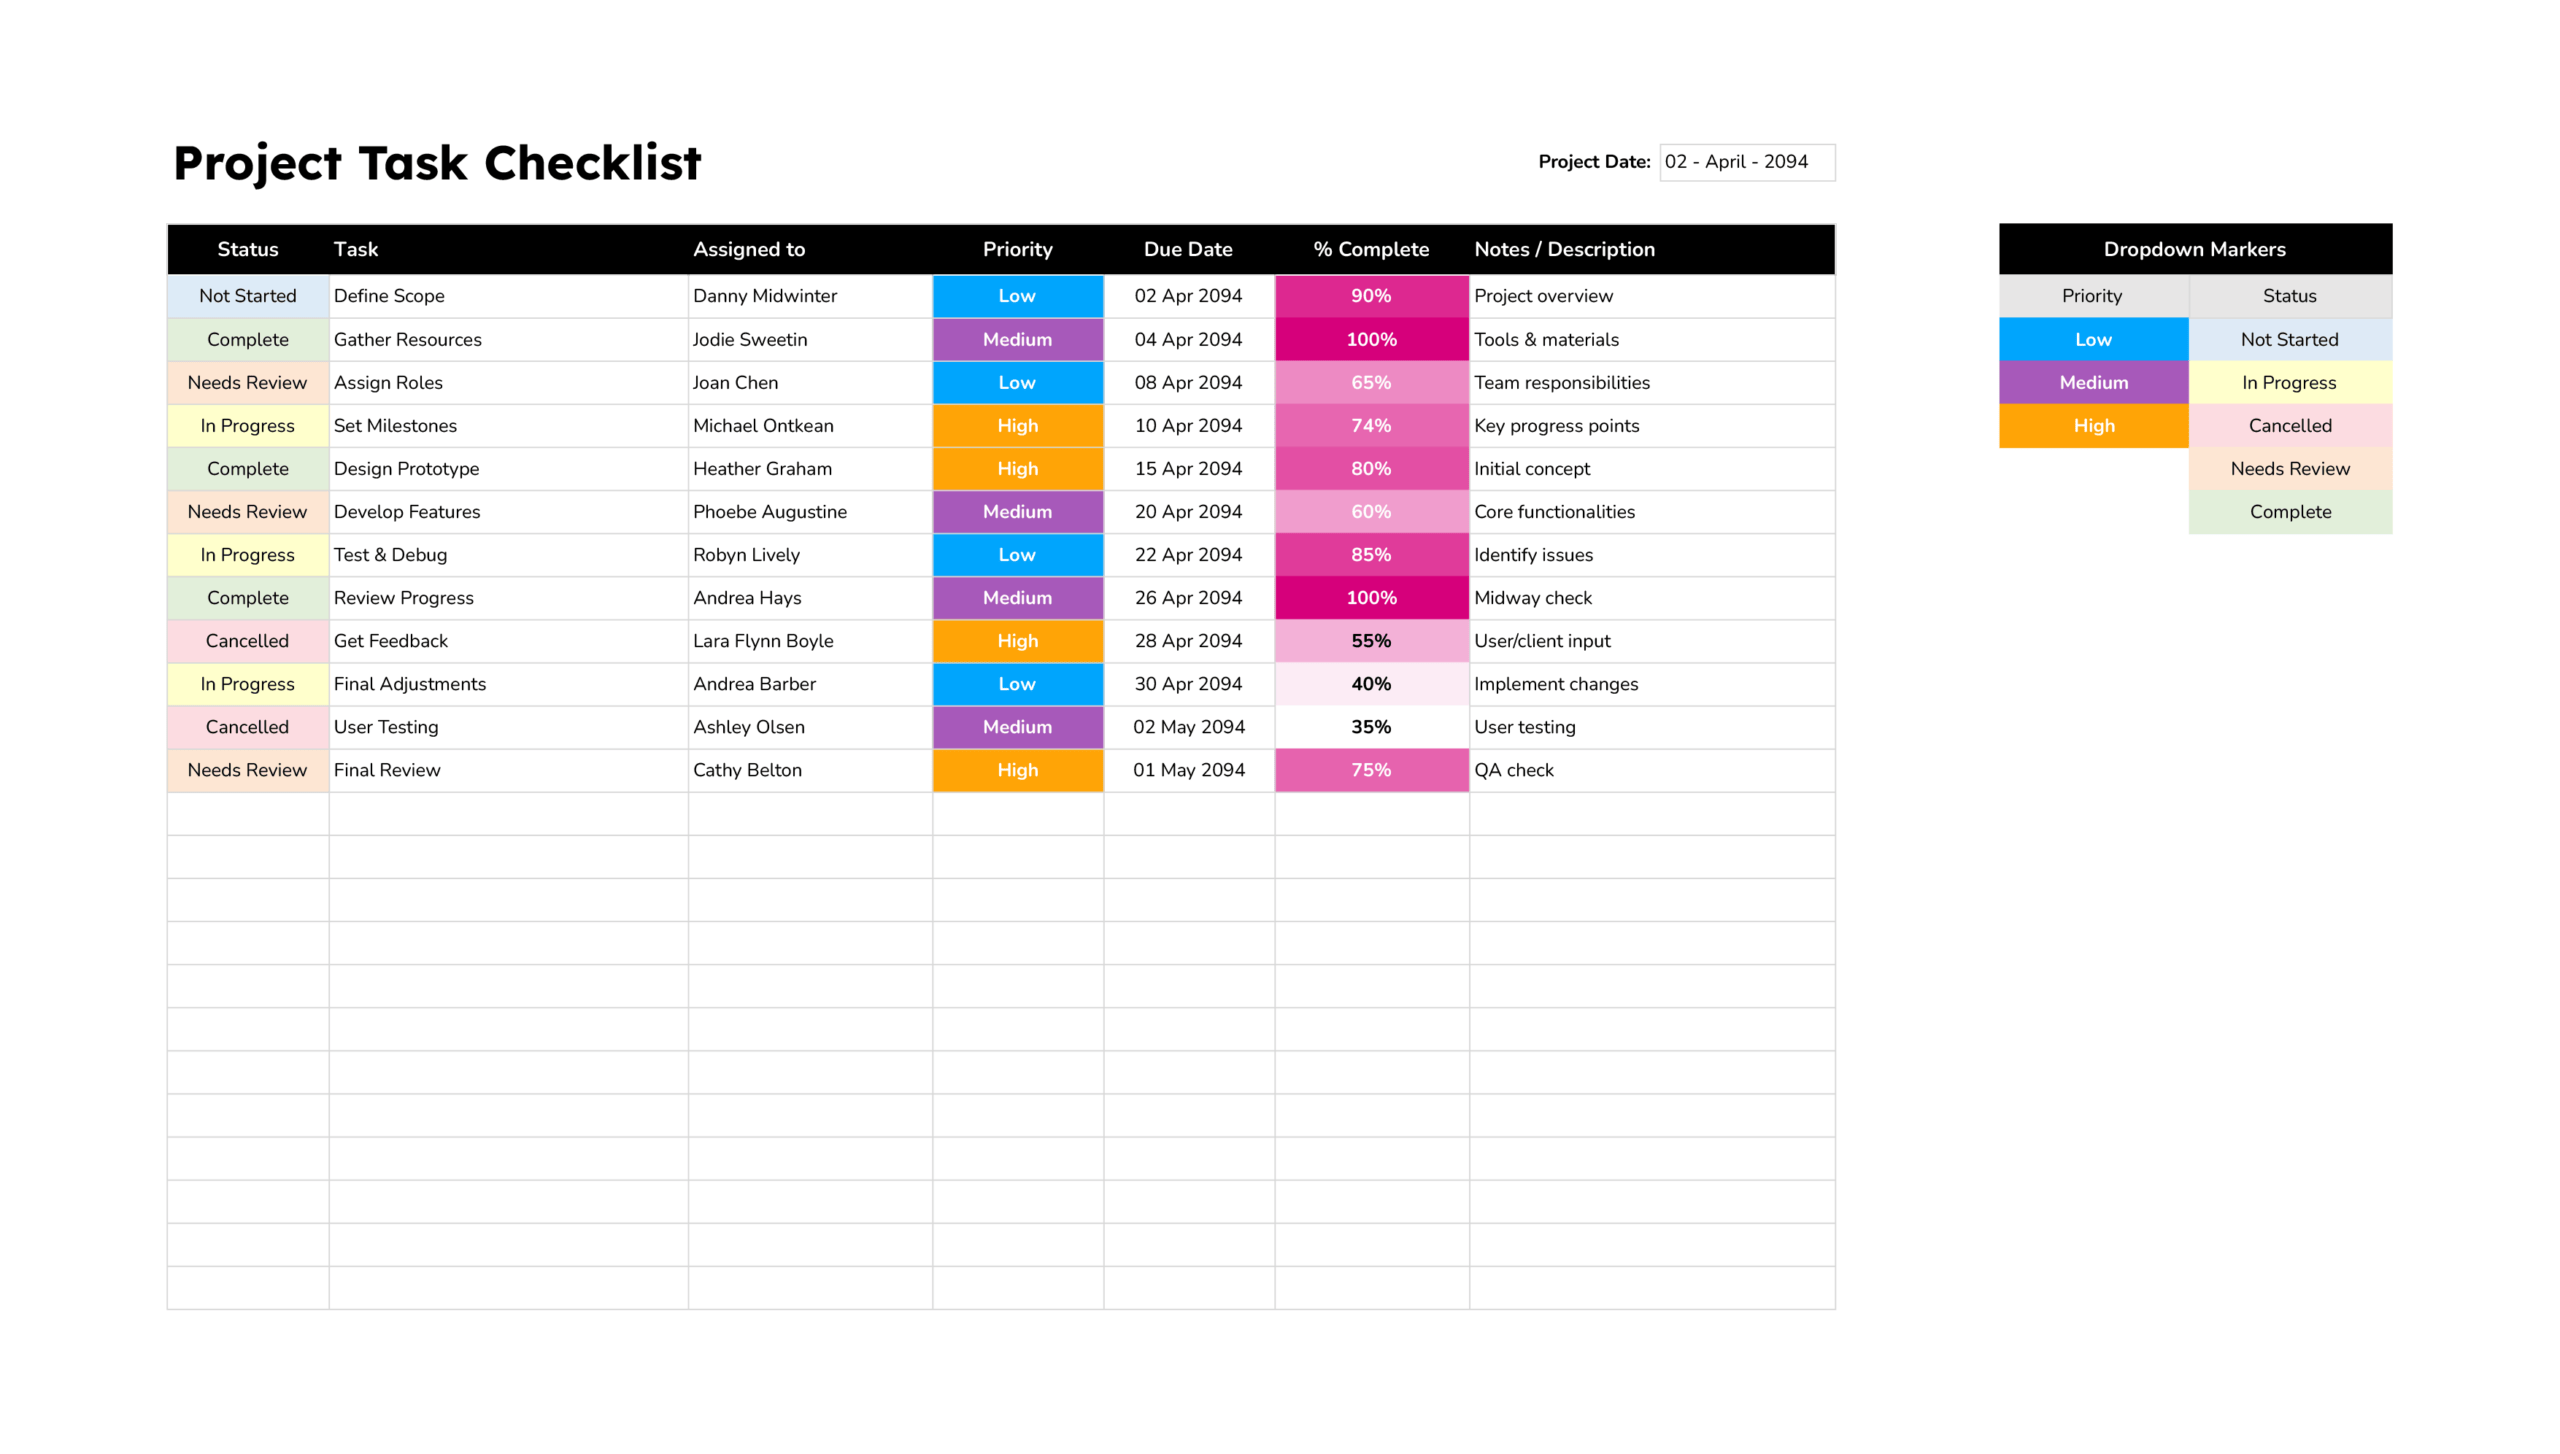

The project checklist template is designed for project managers, team leads, and freelancers who want a clear, easy-to-scan list of tasks for one project. It is suited to short and medium projects such as client engagements, product updates, marketing campaigns, or internal improvement work, where you need task ownership and status tracking but not a full project system.
You can use this project checklist to list tasks by phase, assign each one to a person, set due dates, record short notes, and mark both priority and status with colour-coded labels. This template is designed to work from planning through to project close, so you can start with a draft list and keep refining it as work progresses.
How To Use This Project Checklist Template
The checklist is a single task table. Each row represents one task or deliverable, and each column stores a specific detail such as owner, due date, notes, priority, or status.
Step 1. Enter Project Information
At the top of the sheet, type the project name and the project manager’s name. This keeps the checklist tied to a single project and contact person, which is useful when you print the sheet or share it with clients or stakeholders.
If you manage several projects, save a separate copy of the file for each one and include the project name in the file title. That way the layout stays familiar, but the tasks remain specific to each project.
Step 2. Set Up Phases and WBS Codes
Use the WBS column and the first rows to define phases such as “Phase 1 – Planning and Research,” “Phase 2 – Design and Prototyping,” “Phase 3,” and so on. Phase rows act as headings. The numbered codes under each phase (for example 1.1, 1.2, 2.1, 2.2) identify tasks and subtasks that belong to that phase.
Choose phase names that match how your team already talks about the project: discovery, design, build, testing, launch, etc. This makes it easier to discuss progress because you can refer to both the phase and the WBS code when you talk about a task.
Use phases to describe broad stages of the project and reserve the task rows underneath for specific deliverables. This balance keeps the list short enough to read while still detailed enough for day-to-day work.
Step 3. List Tasks and Assign Owners
In the “Task / Deliverables” column, write concise, action-oriented descriptions. Examples: “Define project scope,” “Prepare budget estimates,” “Build system prototype,” “Internal testing.” Avoid vague entries like “Misc tasks” that do not tell the assignee what success looks like.
Use the “Assigned To” column to record the person responsible for completing that task. This person can coordinate with others, but they are the one who reports progress. For tasks owned by a group, you can enter a team name or two key names if that feels clearer.
Step 4. Add Due Dates and Notes
Enter a “Due Date” for each task. For longer tasks you can still use a single due date as the target for completion, or treat it as the end of a short window, such as the final day of a sprint.
The “Notes” column is your place for brief updates and context. Typical entries include:
- “Waiting for client brief”
- “Depends on Task 1.3”
- “UI review booked for 12 Apr”
- “Scope reduced after feedback”
Over time this column becomes a simple history of why dates shifted or why a task is still open.
Start each note with a short tag such as “Blocker –”, “Update –”, or “Decision –”. When you scan the list, those tags draw attention to the entries that may need discussion in the next meeting.
Step 5. Set Priority and Status (With Colour Coding)
The “Priority” column usually uses values such as Low, Medium, and High. Use this field to show relative importance rather than urgency alone. High is for work that directly influences deadlines or key outcomes; Medium is important but more flexible; Low can move if schedules change.
The “Status” column tracks progress, using values such as Not Started, In Progress, Overdue, Needs Review, and Complete. Updating this column before each check-in gives the team an accurate picture of what is moving and what is stuck.
- About the colour coding. Priority and Status cells use dropdown markers linked to conditional formatting. When you choose a value such as “High” or “In Progress”, the cell changes to the matching colour automatically. This visual layer means you can scroll through the list and quickly see urgent work, overdue tasks, and completed items without reading every word.
- Customising colours and labels. If you want different labels or colours, first update the data validation lists for Priority and Status, then edit the conditional formatting rules so each new label uses your chosen colour. Once the lists and rules match, any cell that uses that label from the dropdown will display the updated colour scheme.
Step 6. Use the Checklist During the Project
At the planning stage, use the template to capture all known tasks, assign owners, set priorities, and add initial due dates. During execution, bring the sheet to stand-ups or weekly reviews. Before each session, update Status, adjust Priority where needed, add new tasks, and refine Notes based on the latest information.
By the end of the project, you will have a record of what was completed, when key tasks finished, and where bottlenecks appeared. You can then archive the file or duplicate it as a starting point for similar projects in the future.
FAQs
Group tasks into clear phases and use brief, outcome-focused descriptions. When the list grows long, use filters on “Status”, “Assigned To”, or “Priority” instead of scrolling through every row. For example, filter to “Overdue” and “Needs Review” before a meeting so discussion stays on work that requires decisions rather than already completed items.
Update the “Assigned To” column as soon as an ownership change is agreed and add a short note such as “Reassigned from Alex to Rina on 10 May.” This keeps the checklist in line with reality and avoids confusion about who is expected to move the task forward. For larger handovers, you can temporarily filter by the outgoing owner and walk through each of their tasks to confirm who will take over.
Open the data validation for a Priority or Status cell and adjust the list values to your preferred labels (for example “Urgent, Normal, Low”). Then open the conditional formatting panel and edit each rule so it looks for those new labels. Test one or two cells after saving the changes. If the text changes colour correctly, you can copy that cell down the column or apply the rule to the full range.
Yes. Many teams use a project schedule or Gantt chart for timelines and dependencies and keep this checklist for day-to-day task tracking. In that setup, WBS codes or phase names connect the two: the schedule shows when a task fits into the wider timeline, while this checklist tracks who is doing it, what its current status is, and any notes or blockers.