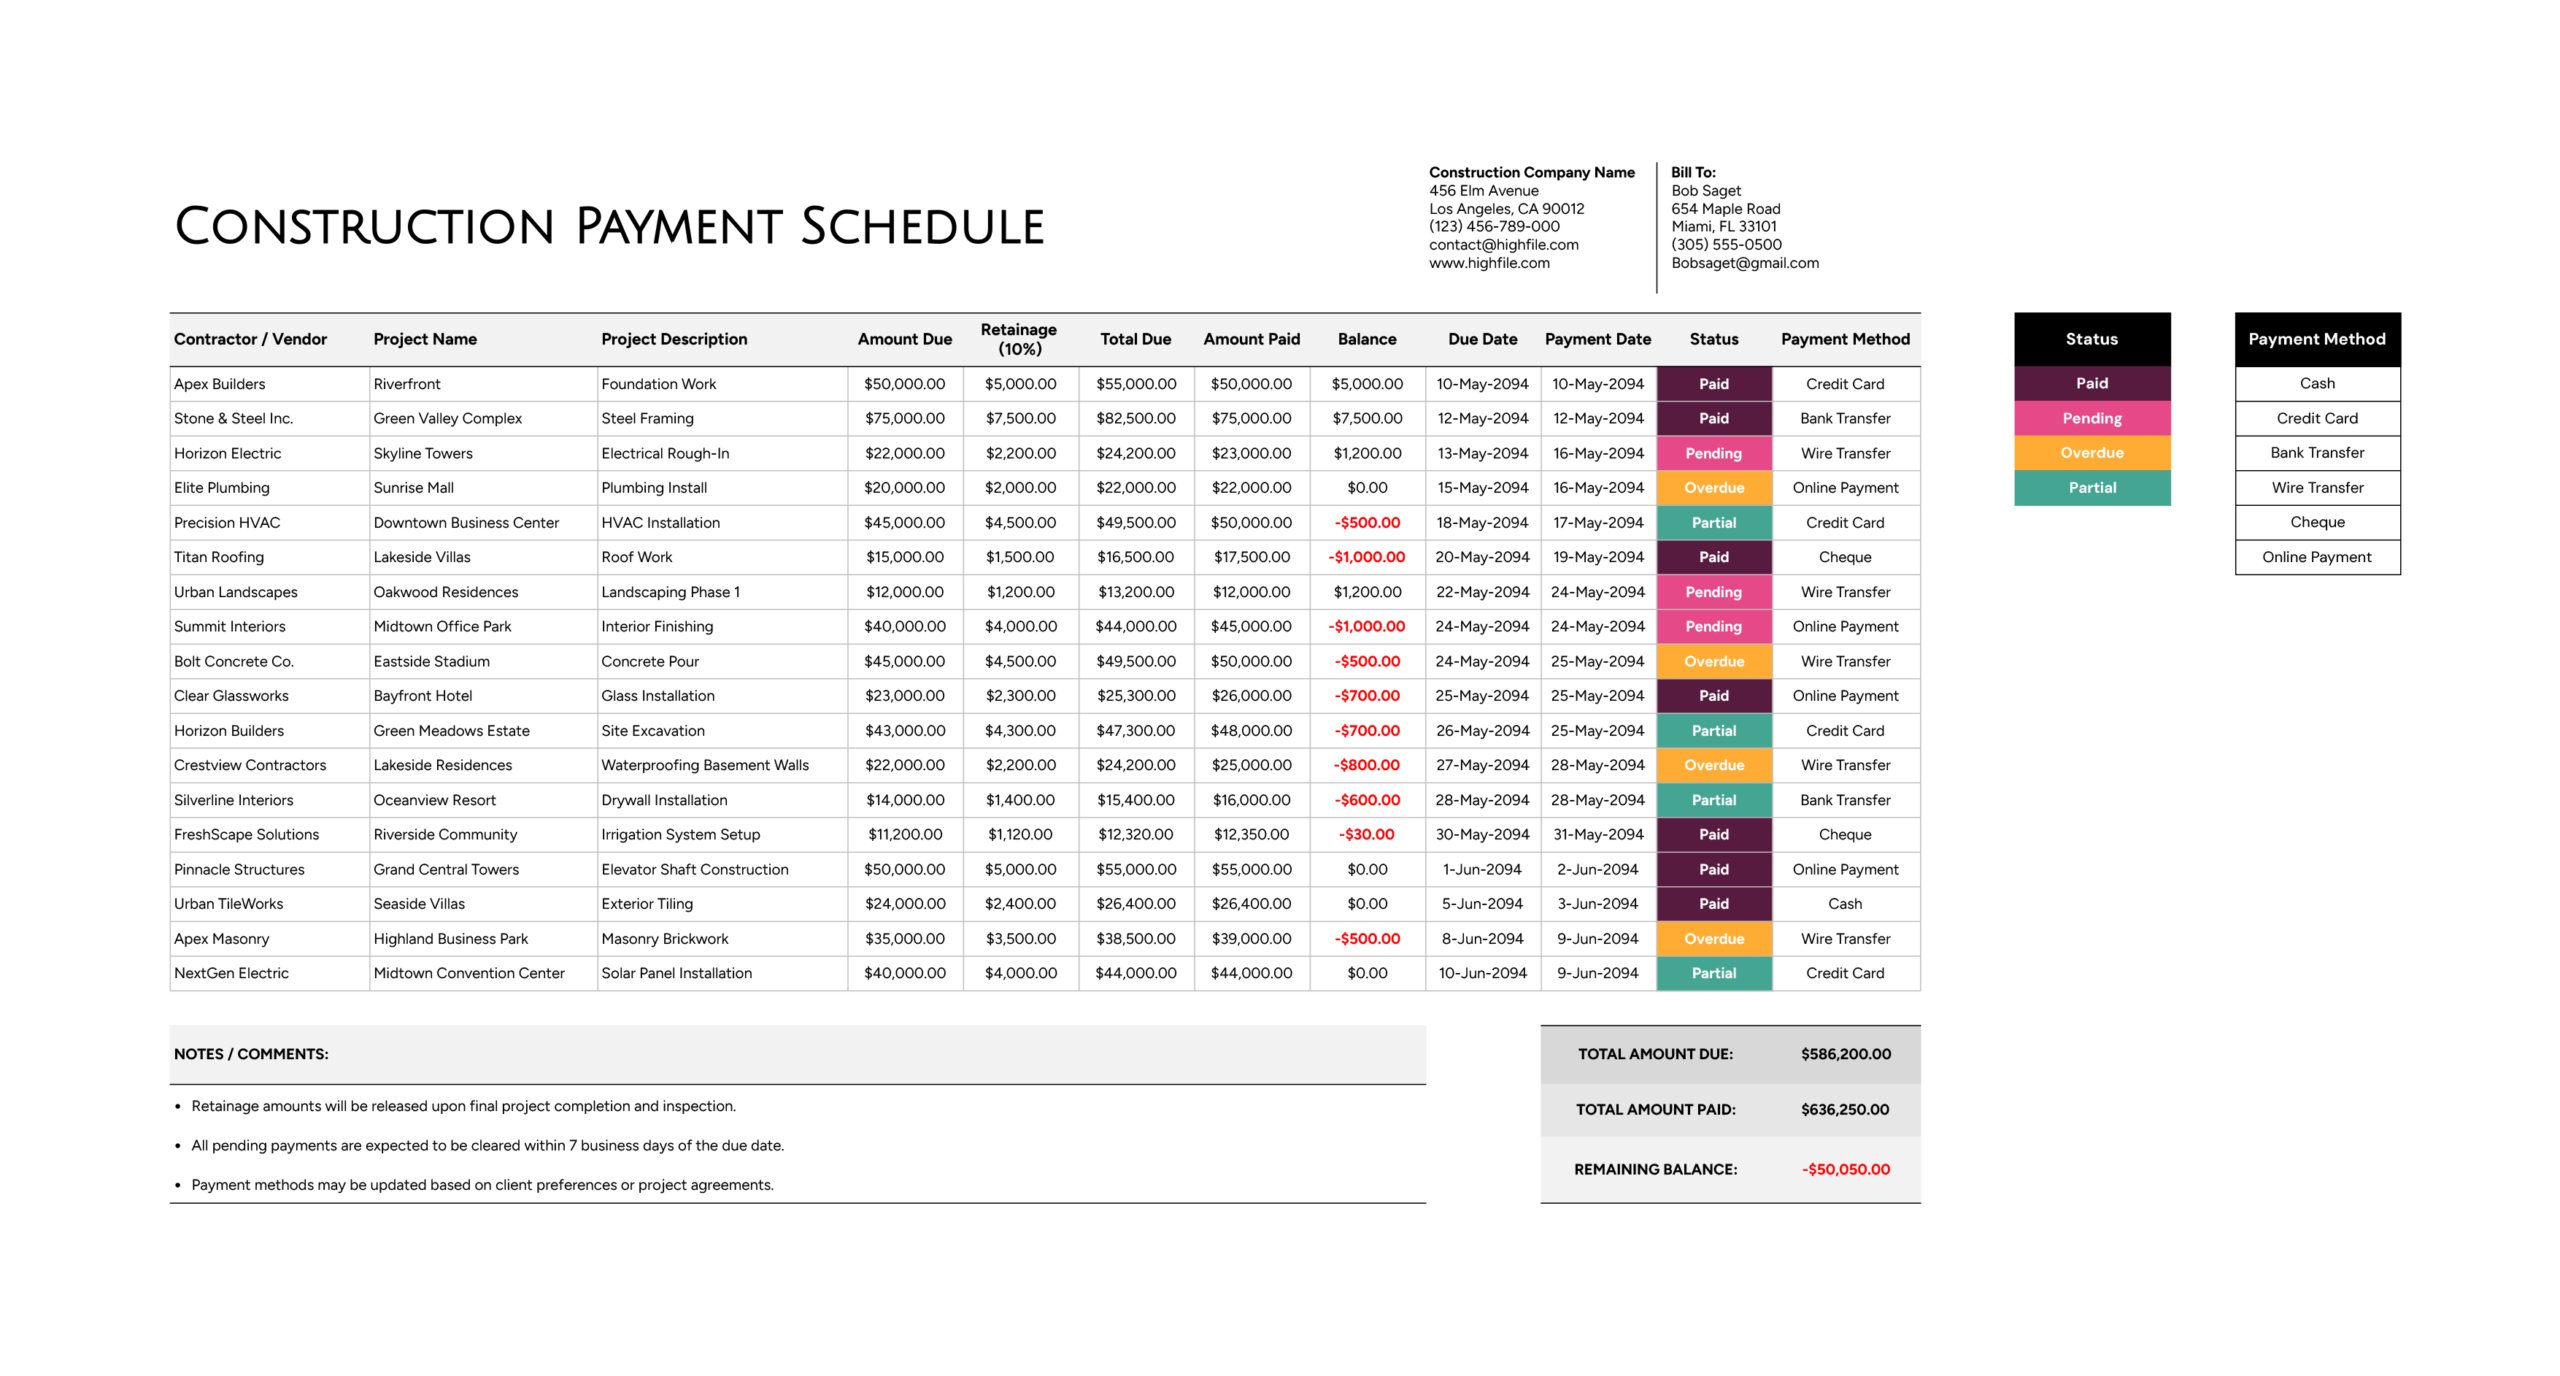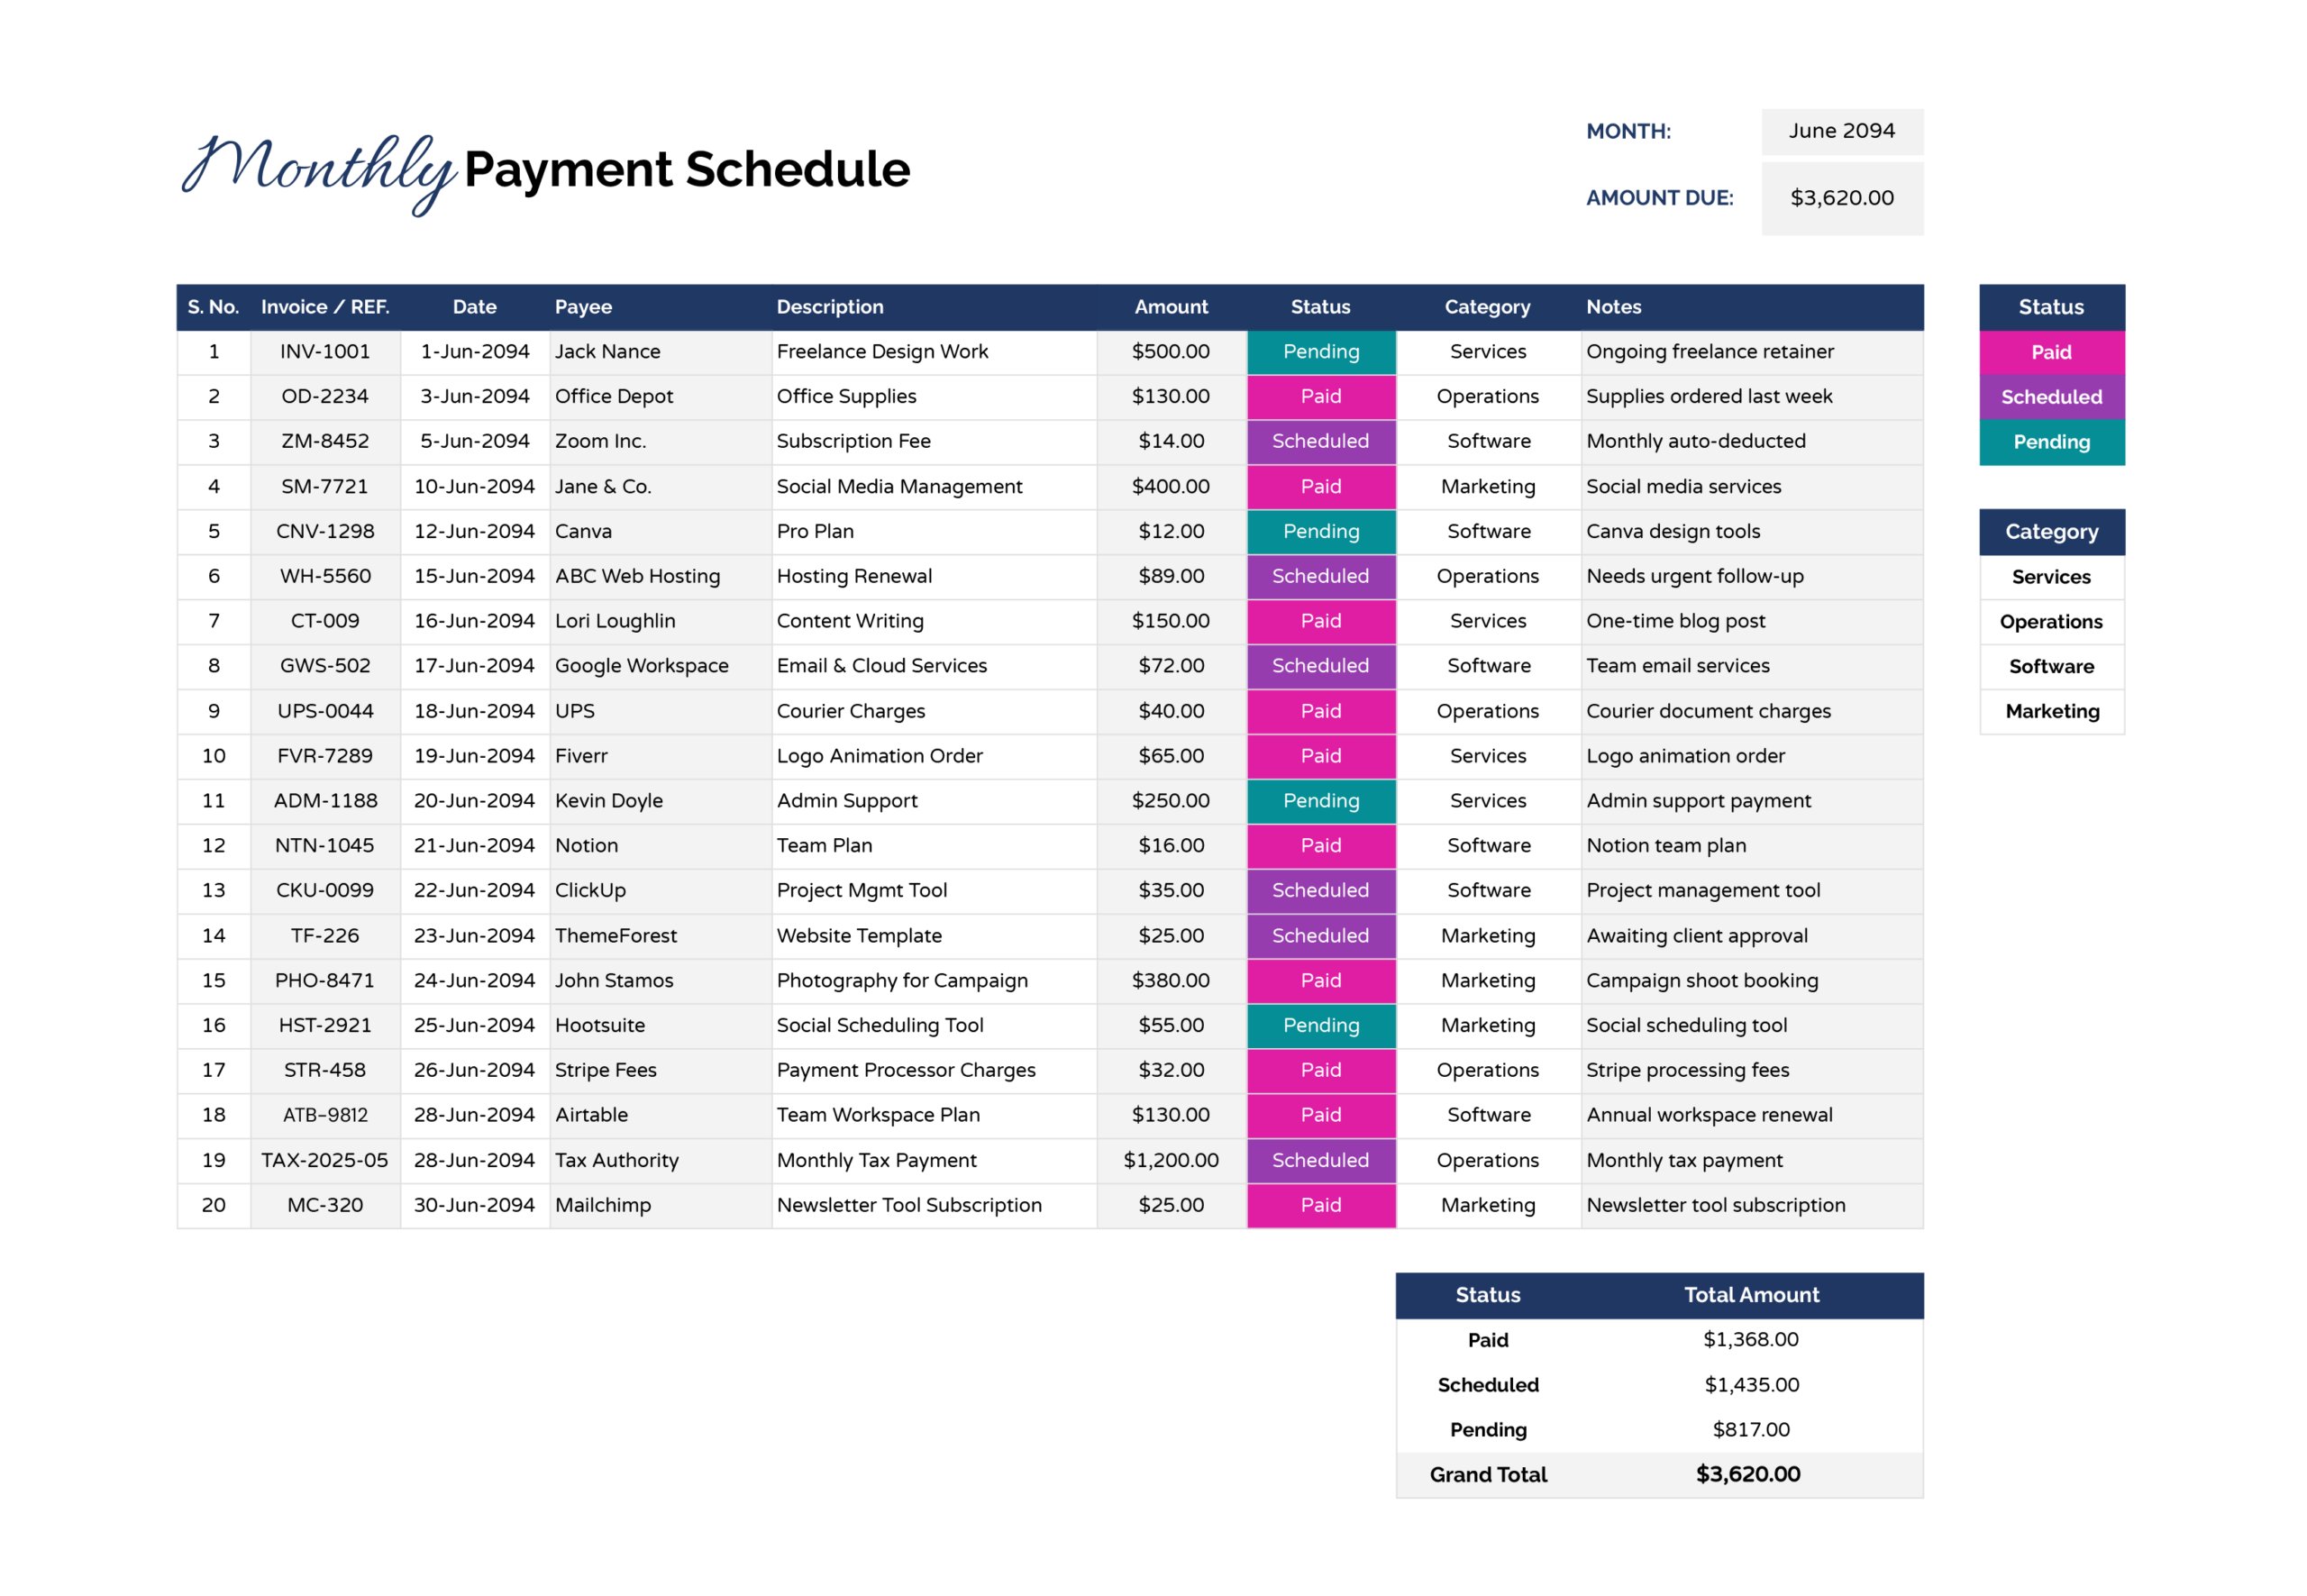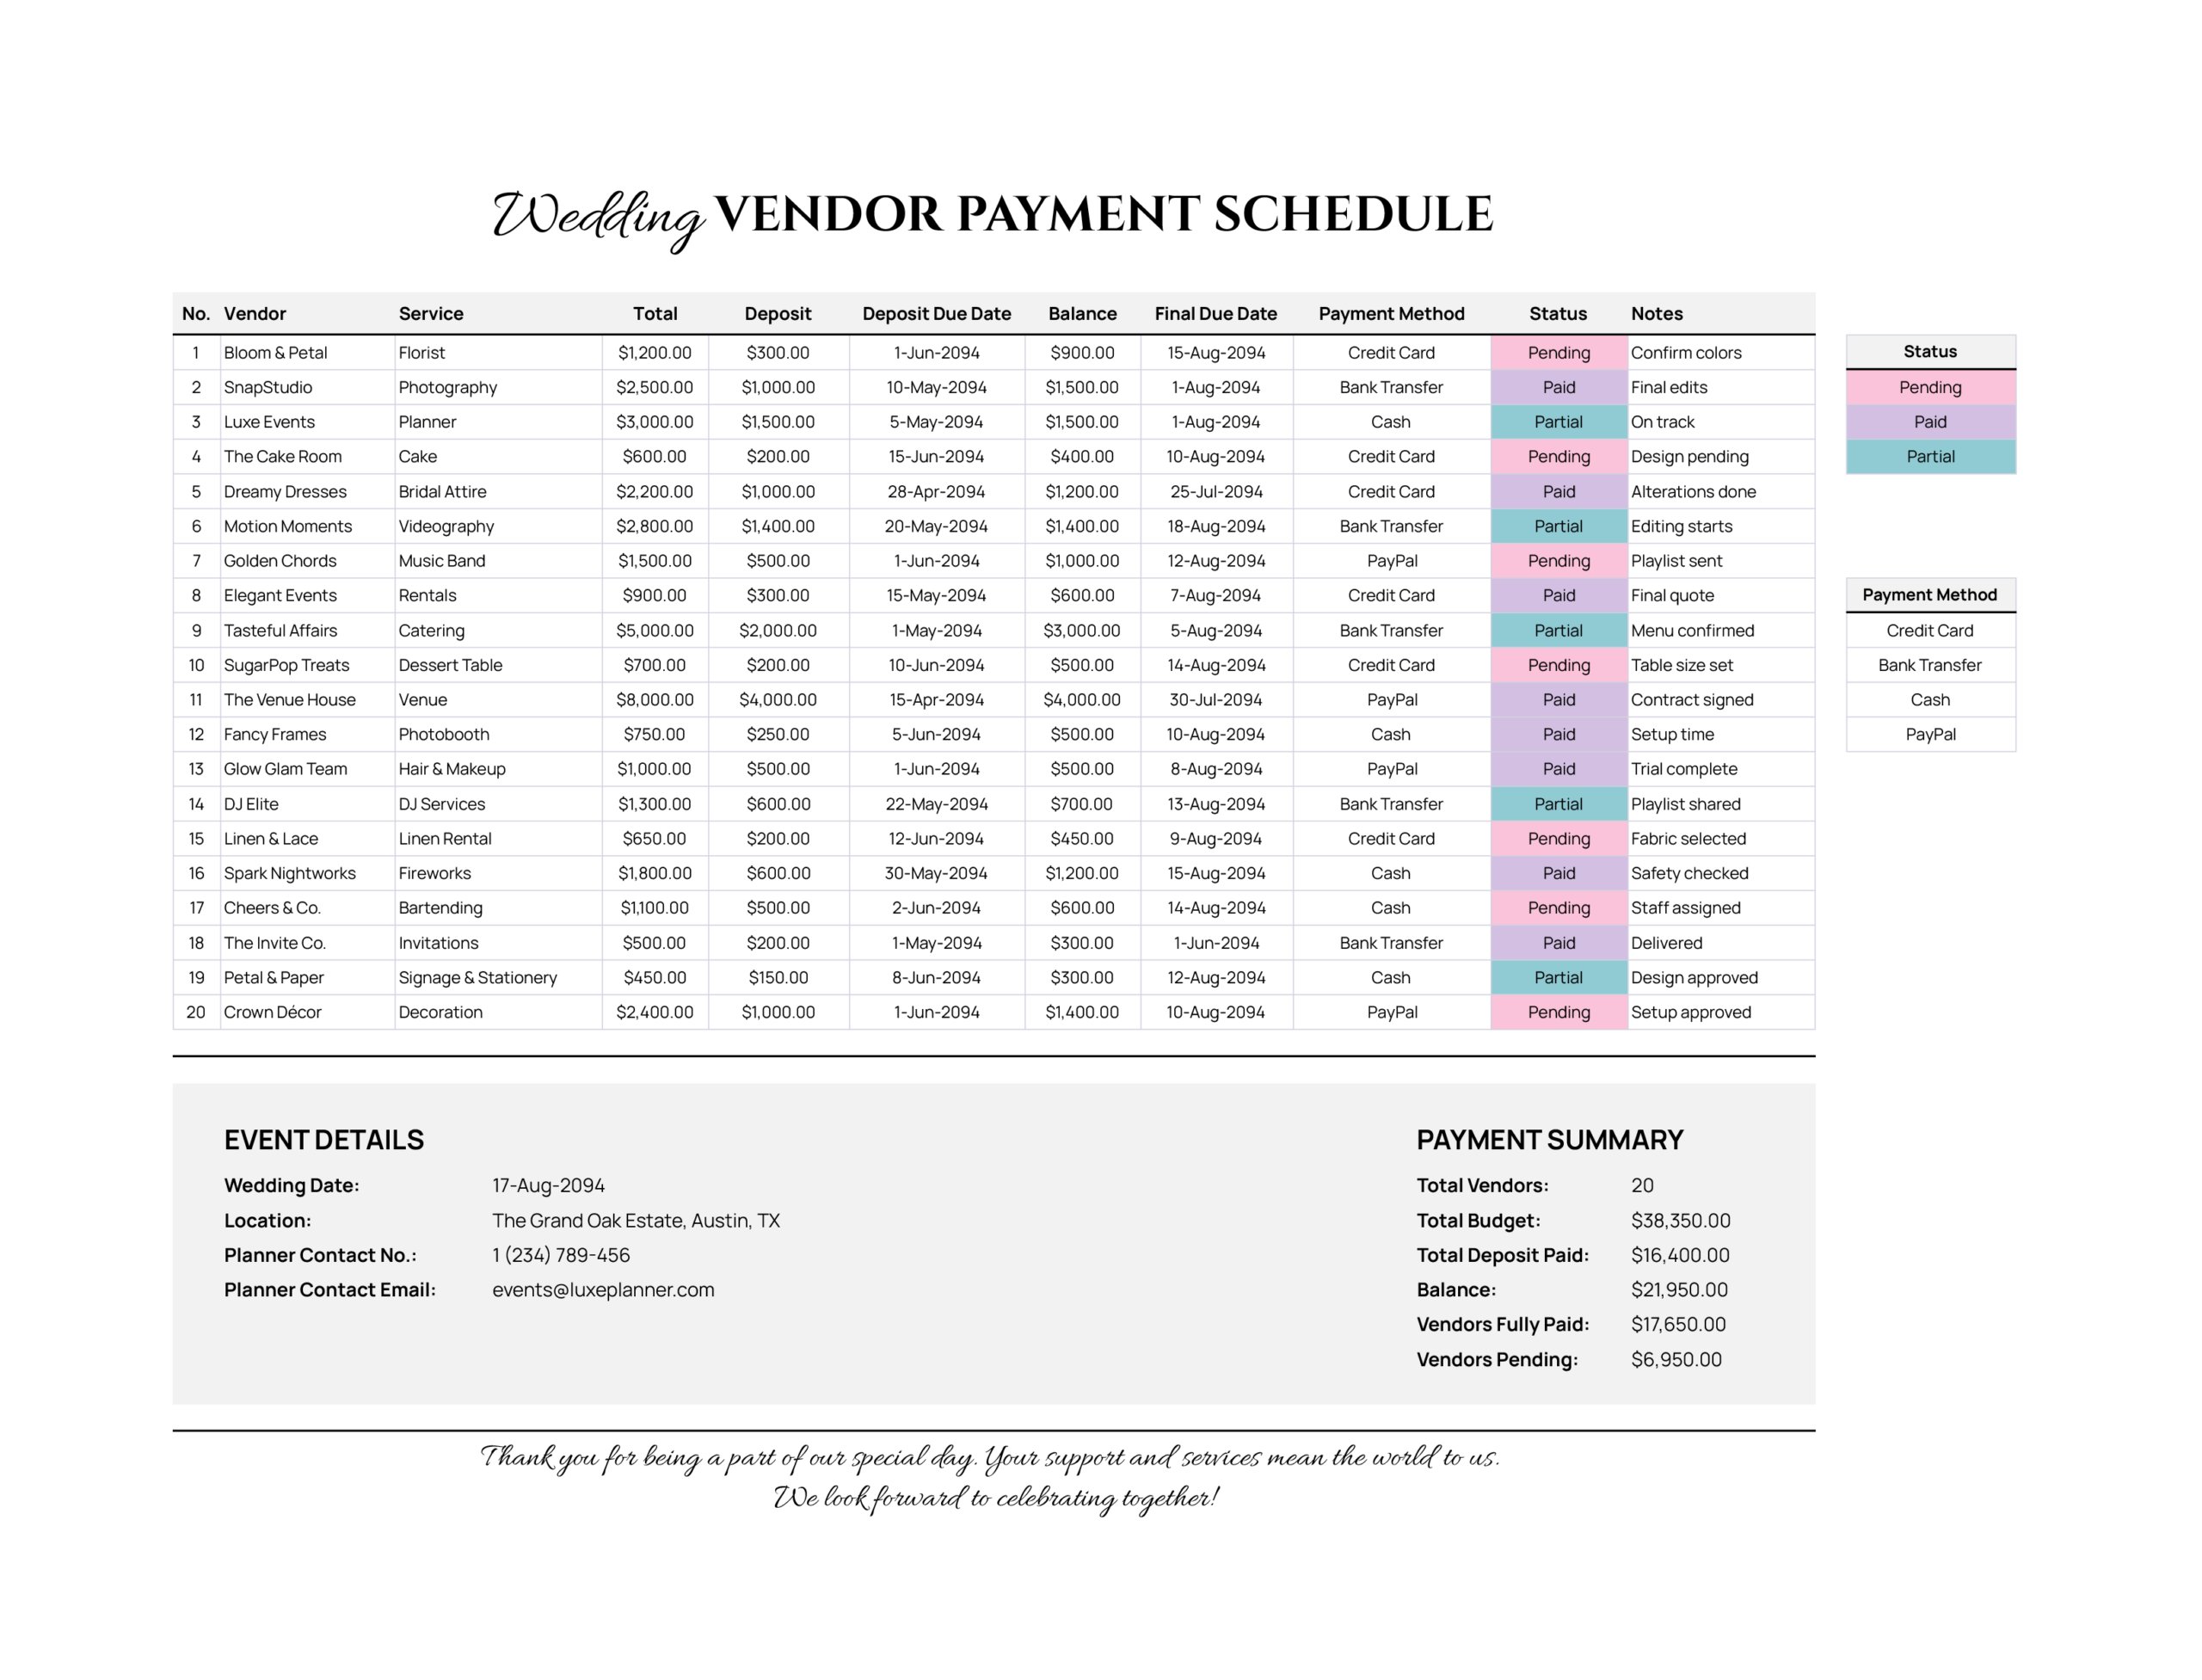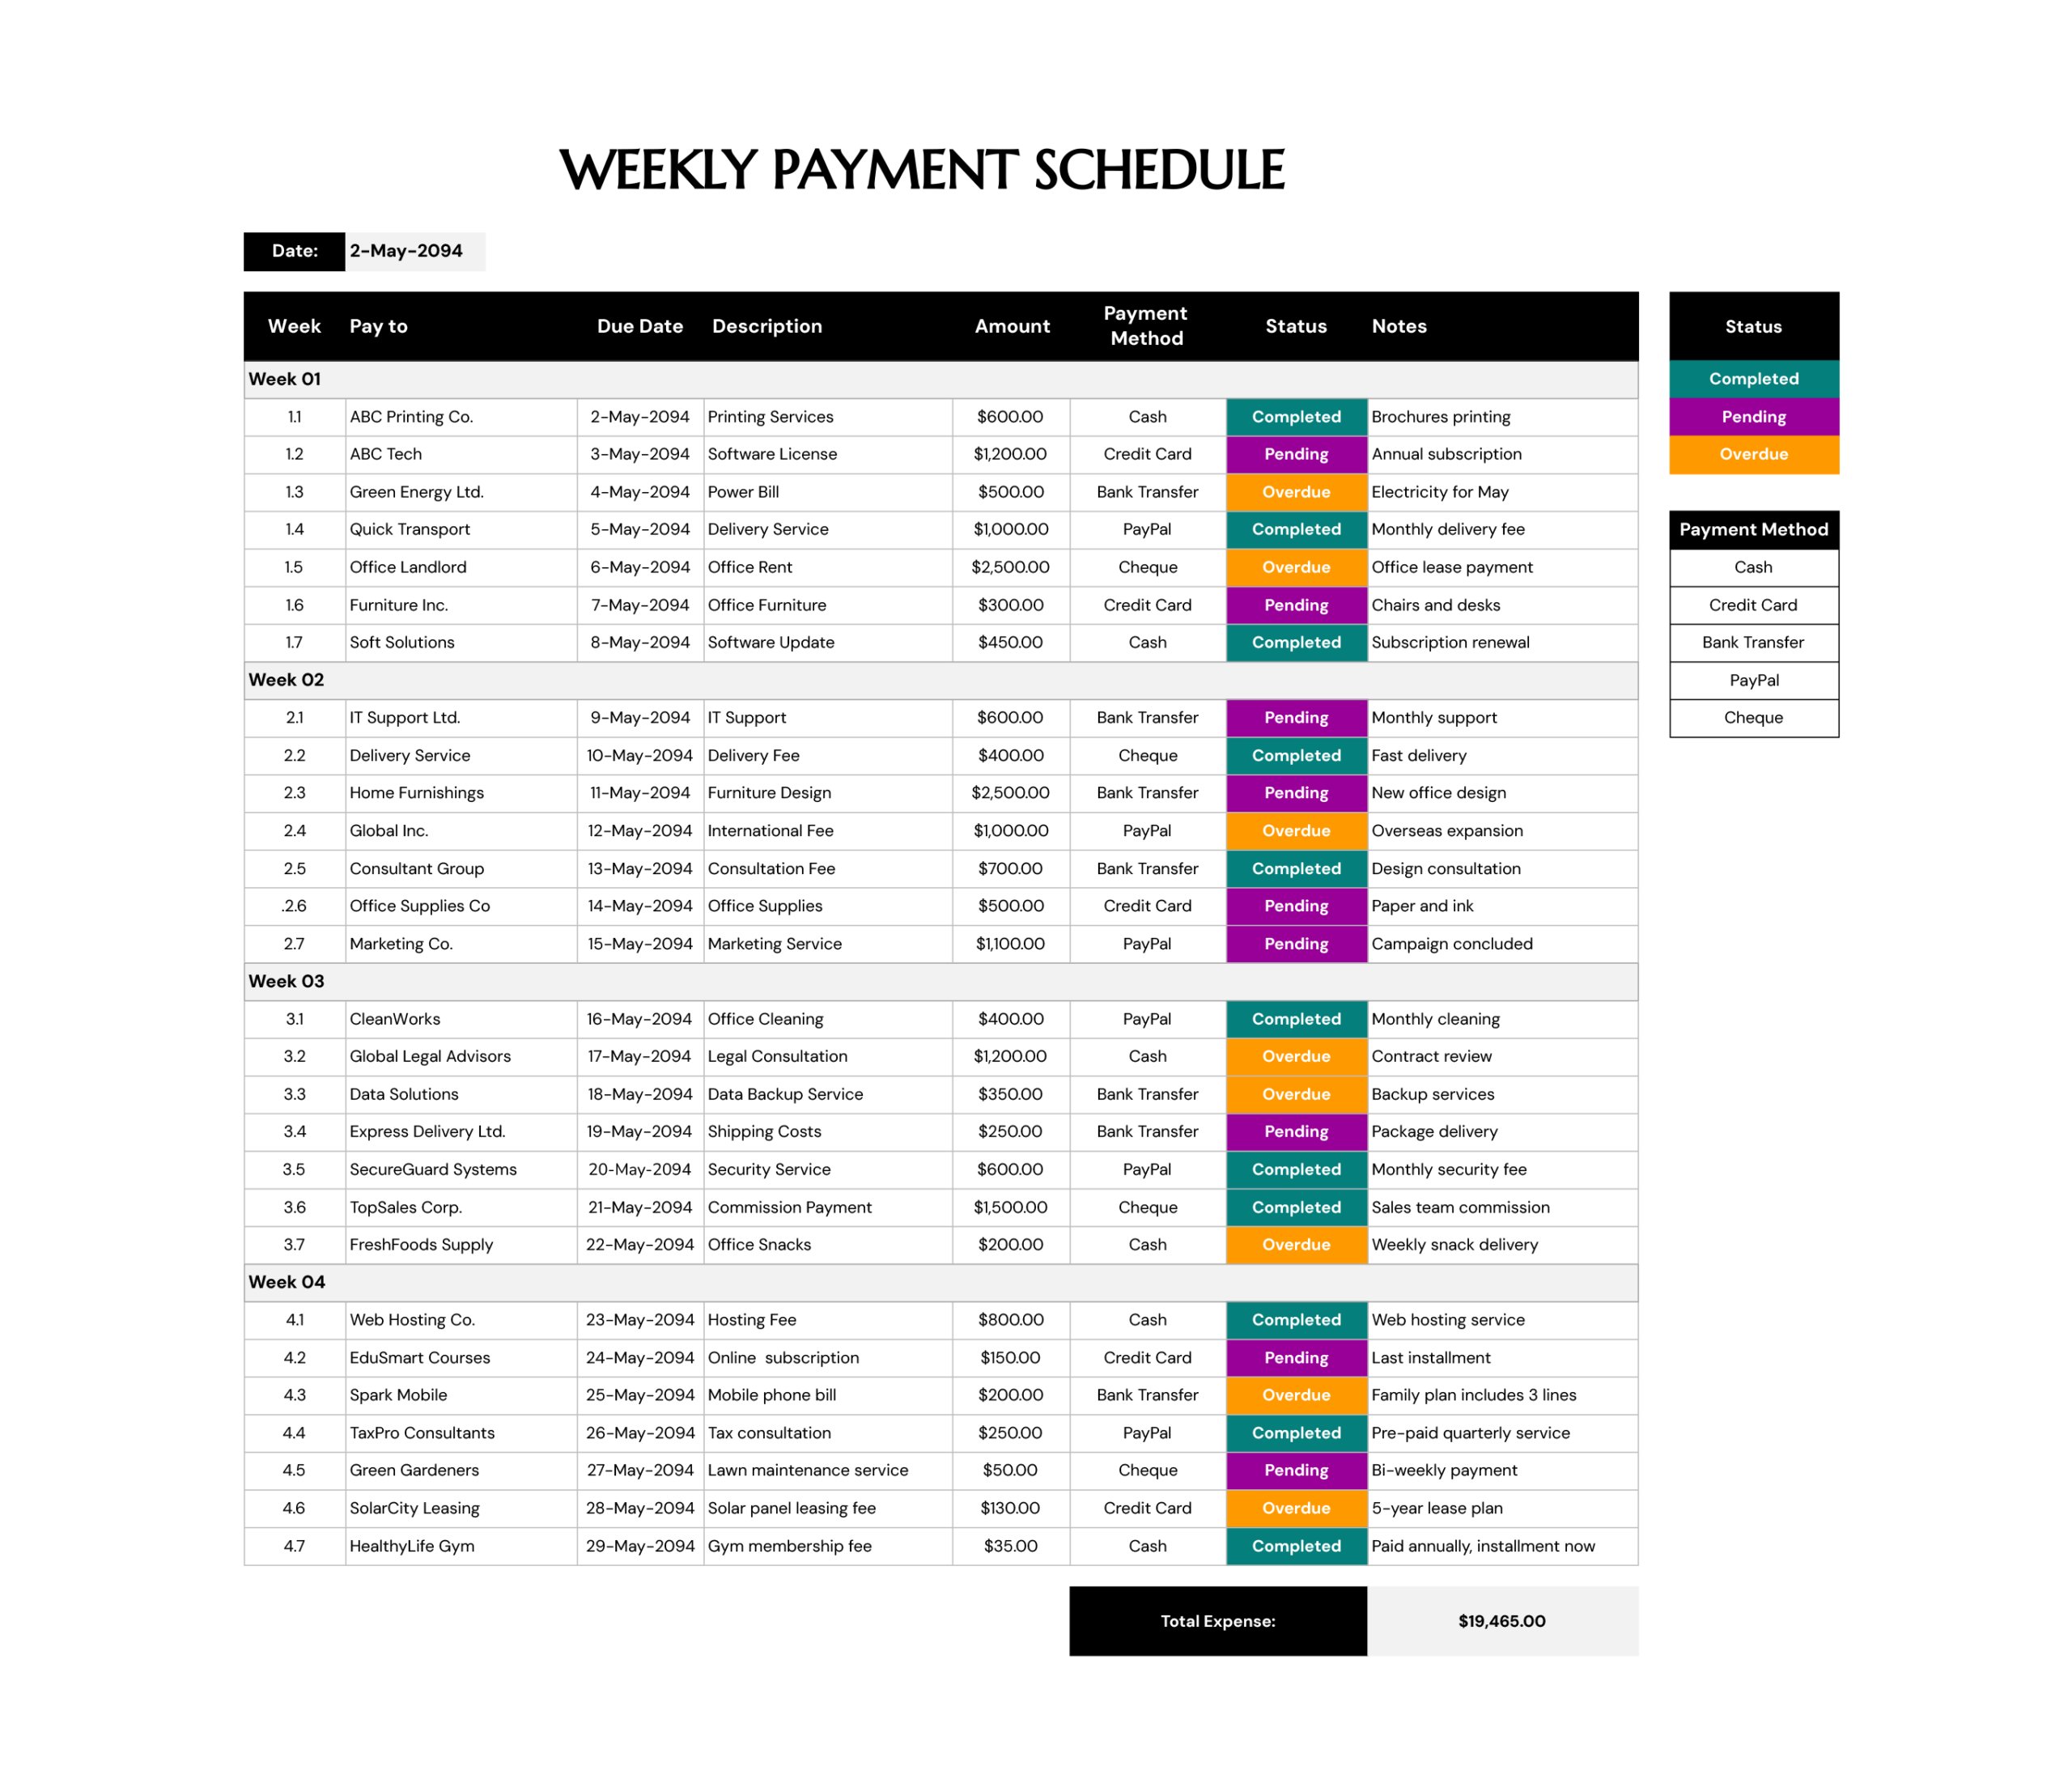

Project payments rarely follow a single pattern. You might have an upfront deposit, monthly progress invoices, milestone billing tied to inspections, and retainage that stays unpaid until the end. When those details sit across emails, invoices, and chat messages, it gets harder to see what is due next and what month the money is expected to go out.
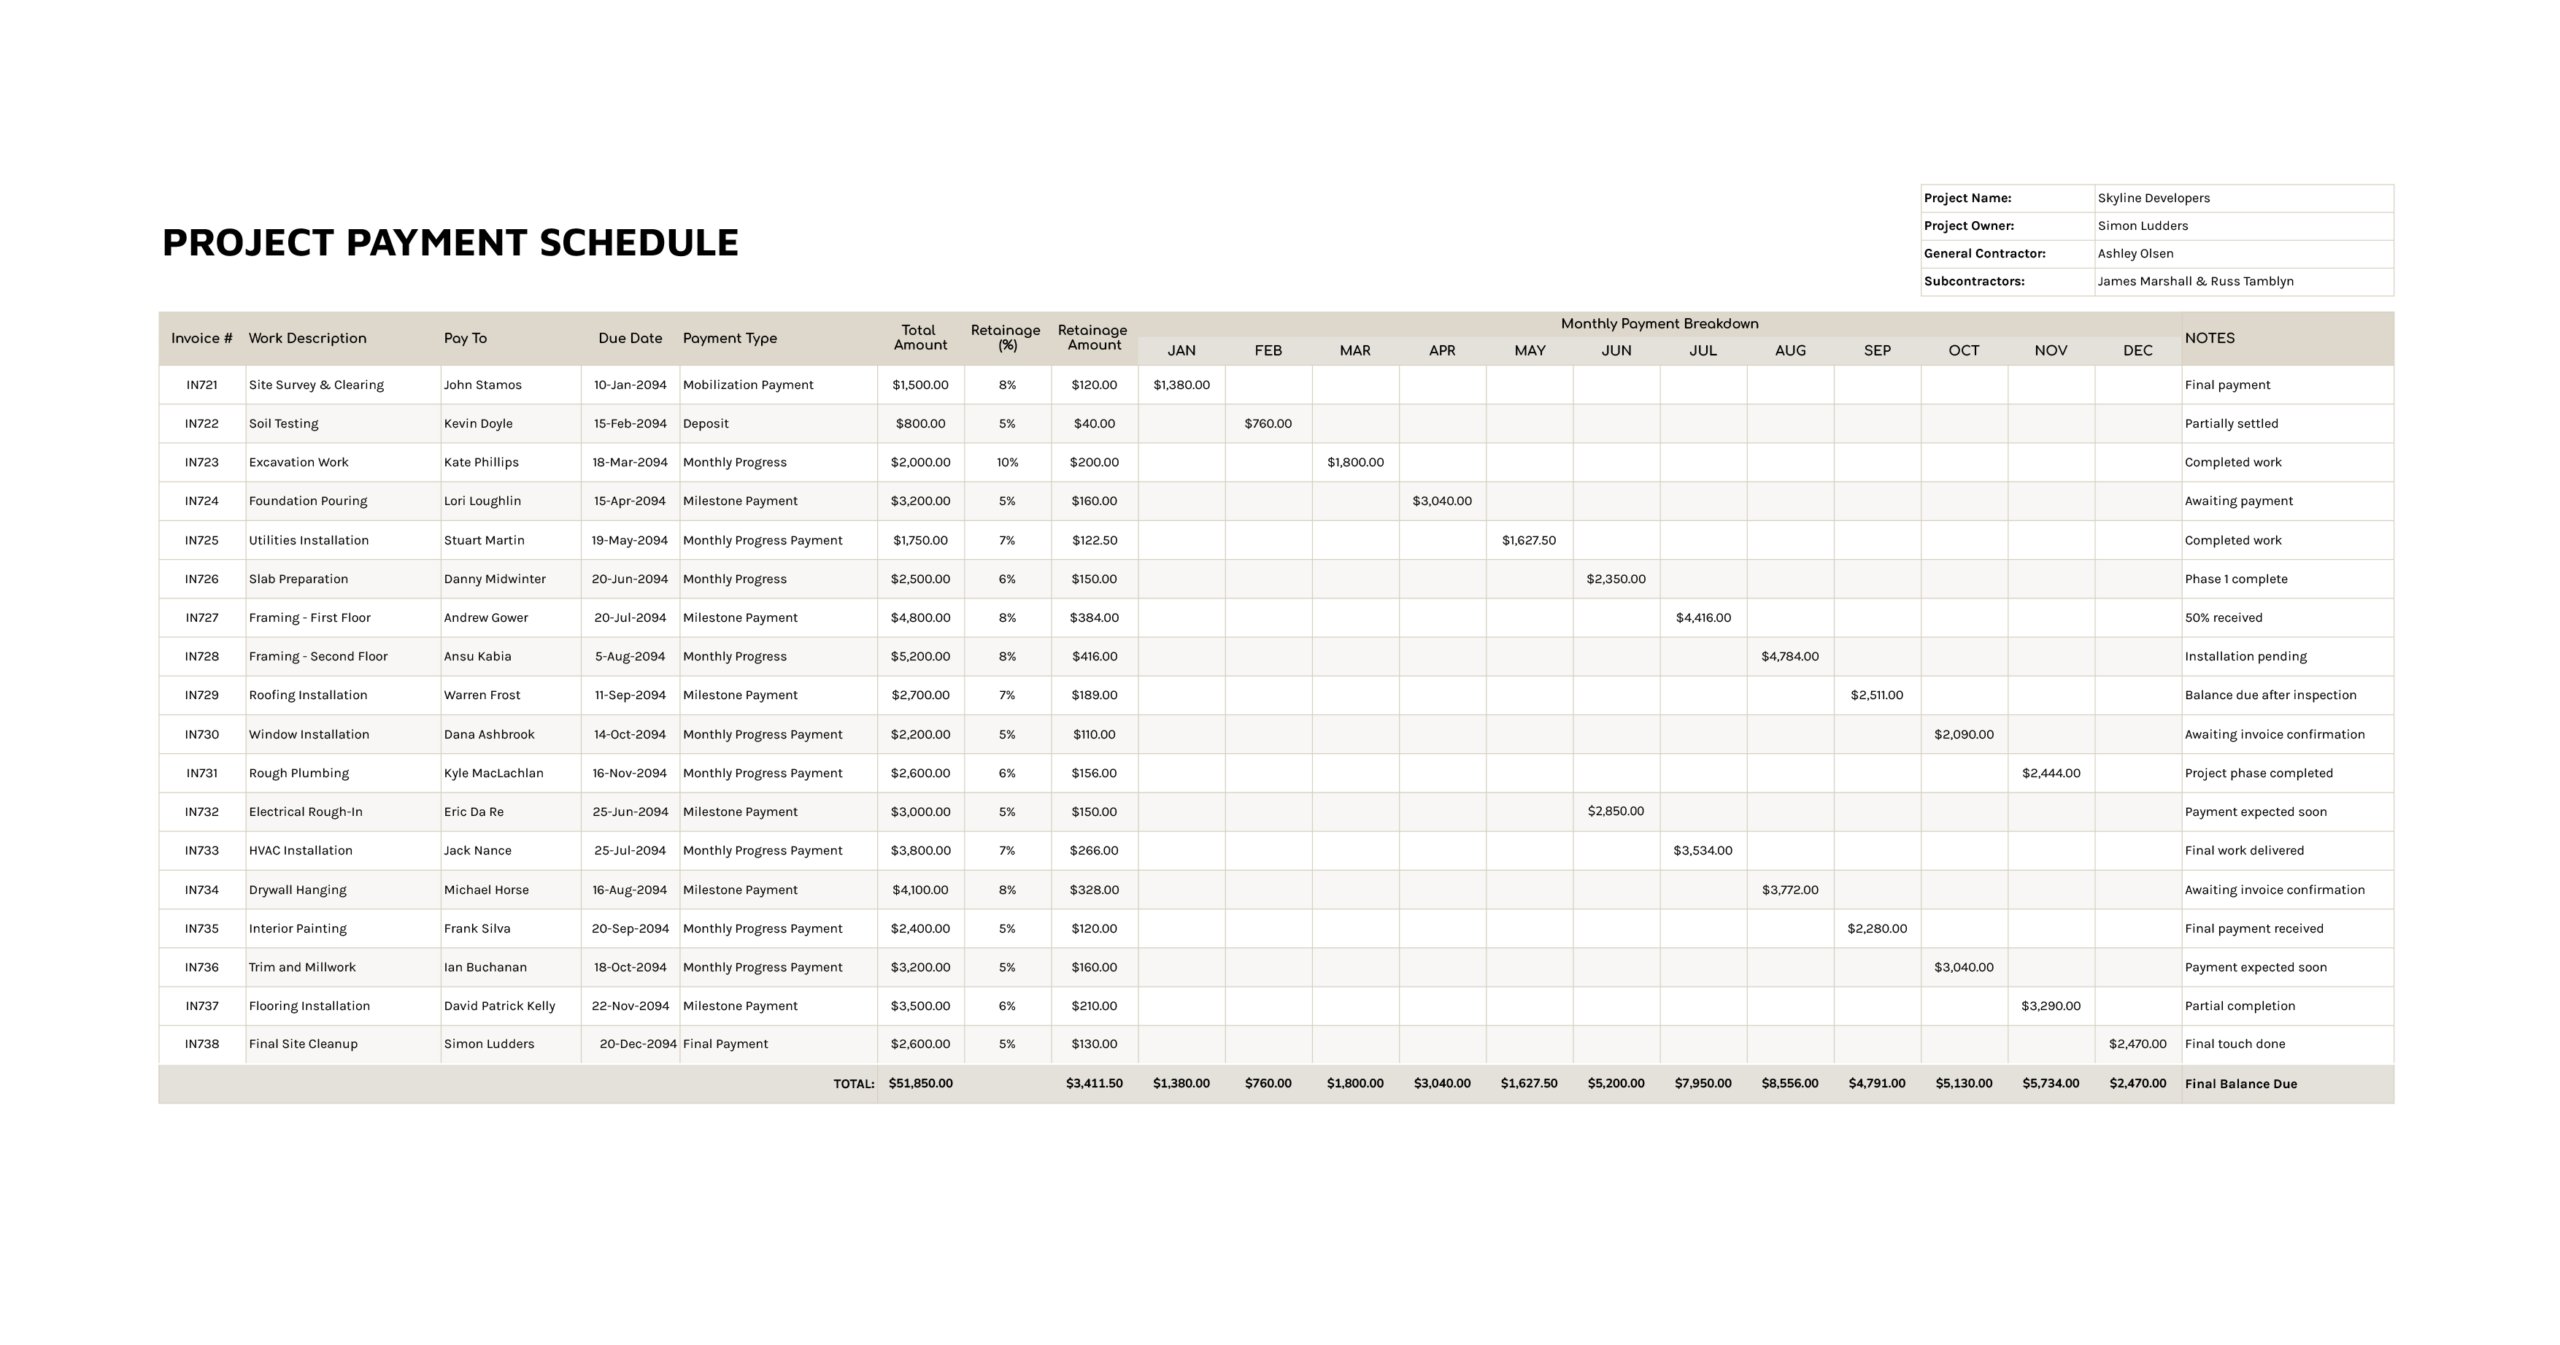
This project payment schedule template keeps one line per invoice or pay application and turns it into a year-based payment plan. The left side records invoice details and retainage. The month columns show when you expect to send the payment. A totals row at the bottom adds up invoice value, retained amounts, and monthly payouts so you can review the plan without manual math.
Once you enter the project reference details, you will follow the same flow for every payment line. Add the invoice details, record retainage, then place the planned payout under the month you expect to pay.
Before You Start
Decide what the month columns will represent and stick to it for every line. Most teams use the month columns for expected cash going out, which means you enter the amount you plan to pay after retainage is held back. If you prefer to show the full invoiced value in the month columns, keep doing it that way across the whole sheet and rely on the retainage columns to show what is being withheld.
Also decide how you want to handle changes. If a vendor submits a revised invoice or a change order, it is usually cleaner to add a new line with its own reference instead of overwriting the original entry. That keeps the payment history understandable later.
Add Project Details
Fill in the top-right project fields such as project name and the key parties involved. This makes the schedule easy to identify when you export it, print it, or share it with accounting.
Enter Invoice Lines
Each row represents one planned payment entry.
- Invoice # should match the vendor invoice number or your internal reference.
- Work Description should be specific enough that someone can understand the payment without opening the invoice.
- Pay To should match the payee name used in your payment system.
- Due Date should reflect the contractual or invoice due date. Keep this as the due date even if you later shift the planned payment month.
- Payment Type is where you label the payment as deposit, mobilization, monthly progress, milestone, final, or any internal wording your team uses.
Keep payee names consistent. If you switch between short names and legal names, filtering and review gets harder, especially near the end of the project when you are reconciling vendor totals.
Record Total Amount and Retainage
Enter the gross invoice value in “Total Amount”. Then enter the retainage rate in “Retainage (%)” and the withheld value in “Retainage Amount”. Retainage often becomes the “end balance” you need to remember at closeout. If you plan to release retainage in a specific month, add a separate line item for the retainage release or final balance and place that amount in the month you expect to pay it. That keeps the year view realistic instead of making the schedule look finished while money is still outstanding.
Plan the Payment Month
Use the “JAN” through “DEC” columns to show when you expect the payment to go out. For most entries, you will place the planned payout in one month and leave the other months blank for that row. If a payment will be split across months, place the partial amounts across the relevant months on the same row.
Use Notes for What Will Matter Later
Use the NOTES column for information that explains timing and processing. Examples include partial payment plans, inspection dependency, invoice corrections, or anything that explains why the due date and planned paid month do not match.
Keep notes short and action-based. If someone scans the sheet in a hurry, they should still understand what is blocking a payment or what changed.
Review the Totals Row
The totals row at the bottom summarizes the overall total amount, total retainage, and totals for each month column. This is useful for spotting heavy payment months and for checking whether the planned monthly payouts still match your project cash plan.
If you add rows beyond the initial entry area, expand the SUM ranges in the totals row so new entries are included in the total amount, retainage total, and monthly totals.
About This Payment Schedule Template
This payment schedule template is available in Microsoft Excel and Google Sheets, so you can use it as a desktop spreadsheet or as a shared file for project and finance coordination. The spreadsheet format keeps totals updating automatically, makes sorting and filtering practical during reviews, and makes it easy to export a fixed copy to PDF when you need a version for approvals, filing, or a project closeout packet.
FAQs
Pick one rule and keep it consistent across every row so the monthly totals stay meaningful. If you use this sheet for cash timing, enter the amount you expect to send in that month and treat retainage as money that stays back until a later release. If you use it for billing visibility, enter the full invoiced value in the month columns and rely on the retainage columns to show what is being withheld. Either approach works as long as you do not mix methods within the same schedule.
Retainage is easiest to manage when it appears as its own planned payment. Add a separate line for the retainage release tied to that vendor and label it as retainage release or final holdback. Then place the planned payout in the month you expect to release it. This keeps the year view realistic, especially when most regular invoices are finished but closeout money is still pending.
Keep a traceable trail instead of overwriting the original line. Add a new line for the revision or change order amount and reference it in the invoice number or notes so the relationship is obvious during review. This approach reduces confusion when someone compares the schedule to invoice PDFs and approval records.
Yes, as long as you treat each billed event as its own line item. Use the payment type field to label the billing stage such as progress, milestone, or final, then place the planned payout into the expected month. If one progress bill will be paid in parts, split the planned payout across multiple months on the same row and note the reason so the entry reads cleanly later.
Use one copy of the schedule per year and keep naming consistent, such as Project Name 2096 and Project Name 2097. Carry over any unpaid retainage releases or delayed invoices into the next year as new planned lines so the next year’s monthly totals reflect the real remaining cash plan. This approach stays cleaner than stretching the same sheet beyond December.